
Connect CustomCat to WooCommerce & WordPress

Here’s a step by step guide to set up your WordPress WooCommerce store with CustomCat fulfillment.
Create a website
In order to use CustomCat to fulfill your WooCommerce orders, you must first create a website with WordPress and choose a web hosting service.
WordPress Hosting
A web hosting service provider is a business that services or hosts your website so that it can be viewed on the internet. There are hundreds of web hosts out there but WordPress recommends any of the following: Bluehost, Dreamhost and Siteground.
Once you have selected a web hosting plan, you will be able to connect your Domain Name. Domain name is the name and destination of your website. If you don’t already have a domain name, you can register a new name through your web host now.
After you purchase hosting (storage), you’ll receive an email with details on how to login to your web hosting control panel.
This is where you integrate your hosting to your WordPress website. Fill in your website name, admin username, and password. Click install.
Once the installation is completed, the link will take you to the WordPress login URL.
Congratulations you have created your first website, you may now log in.
Select Theme
WordPress offers a variety of free and paid themes to choose from.
Click Appearance >Themes > Add New.
Beginners select Storefront as your theme. It is specifically designed for an ecommerce business.
Install WooCommerce Plugin
If you have an existing site and want to install WooCommerce, using WordPress Admin is the most straightforward option as it handles everything for you.
Installation
To install WooCommerce:
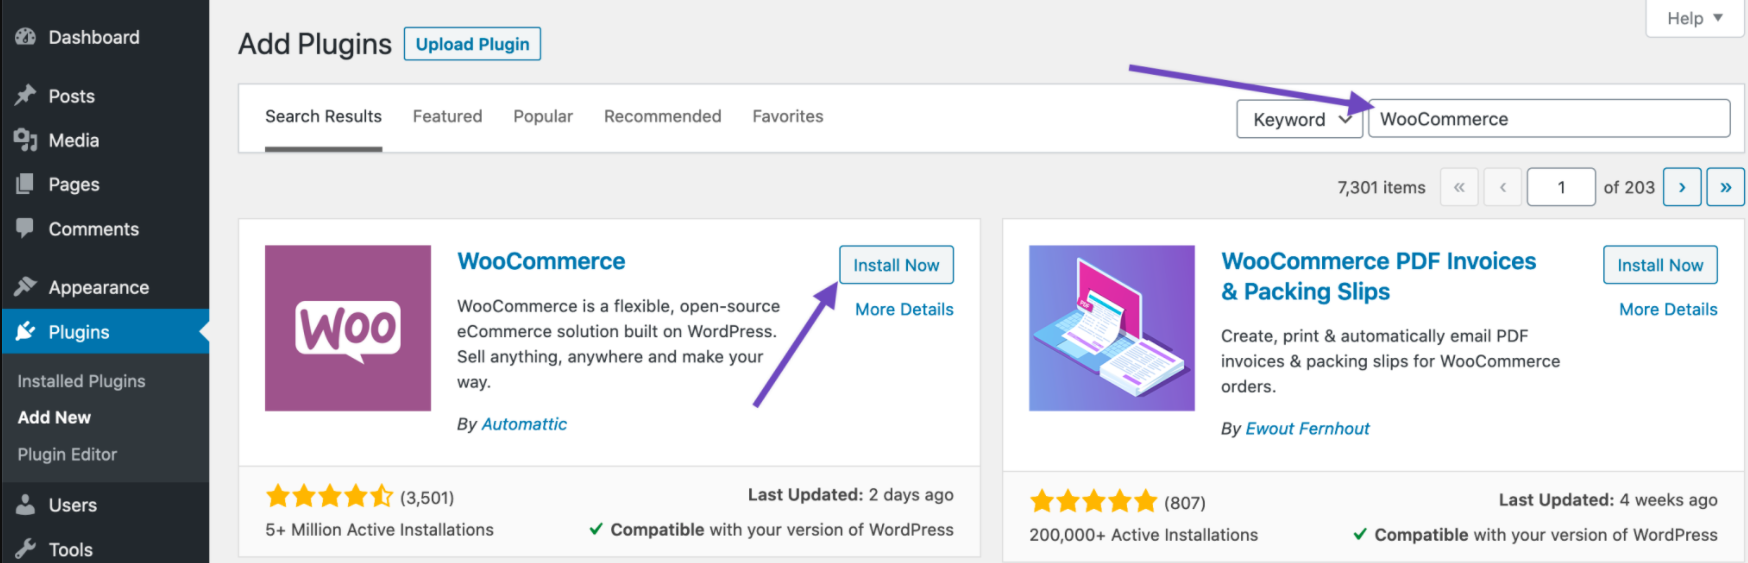
- Go to: Plugins > Add New.
- Search for “WooCommerce”
- Click Install Now.
- Click Activate Now and you’re ready for the WooCommerce Wizard.
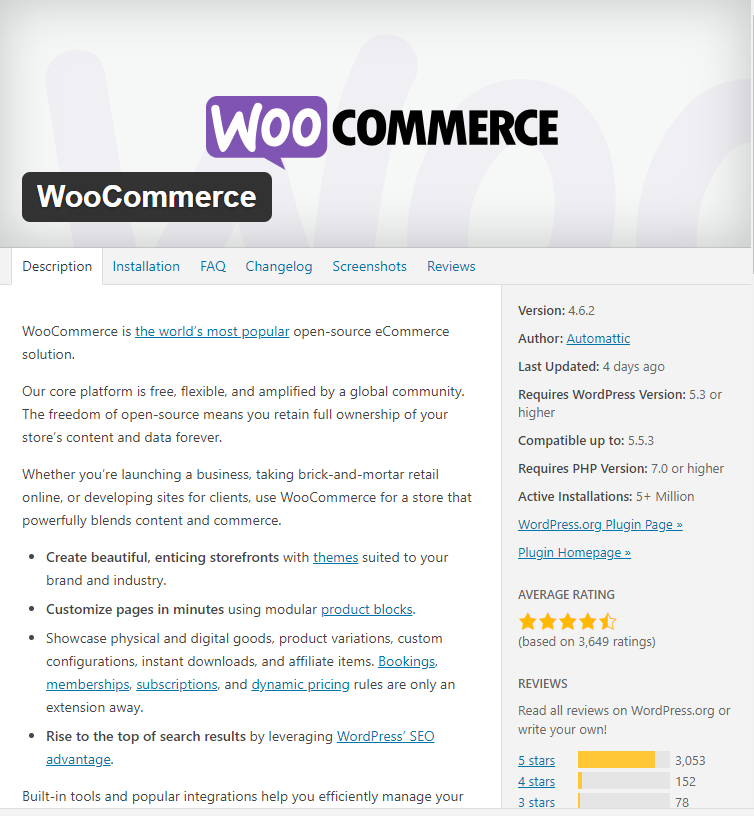
Welcome to the world of WooCommerce!
When you get to the Welcome to the world of WooCommerce pop up, keep in mind that you can always skip steps and go back later and customize anything you want to your preference.
WooCommerce Plugin
Page Setup
If you set up new pages yourself, or want to change what pages are used for things like cart and checkout, you need to tell WooCommerce which pages to use.
To tell WooCommerce what pages use for Cart, Checkout, My Account, and Terms and Conditions, go to WooCommerce > Settings > Advanced.

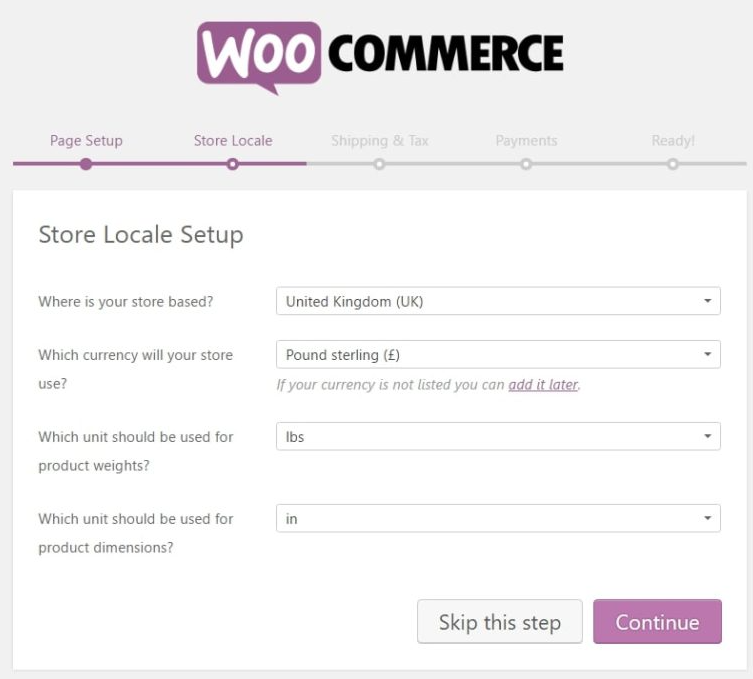
Store Locale Setup
The locale is a truly crucial part of your store setup. Those few parameters define your business origin, currency, and preferred units:
Shipping & Tax Setup
CustomCat will be shipping products to customers on your behalf, check the box that says “Yes, I will be shipping physical goods to customers”. Please follow all applicable Sales Tax laws in your state/country.
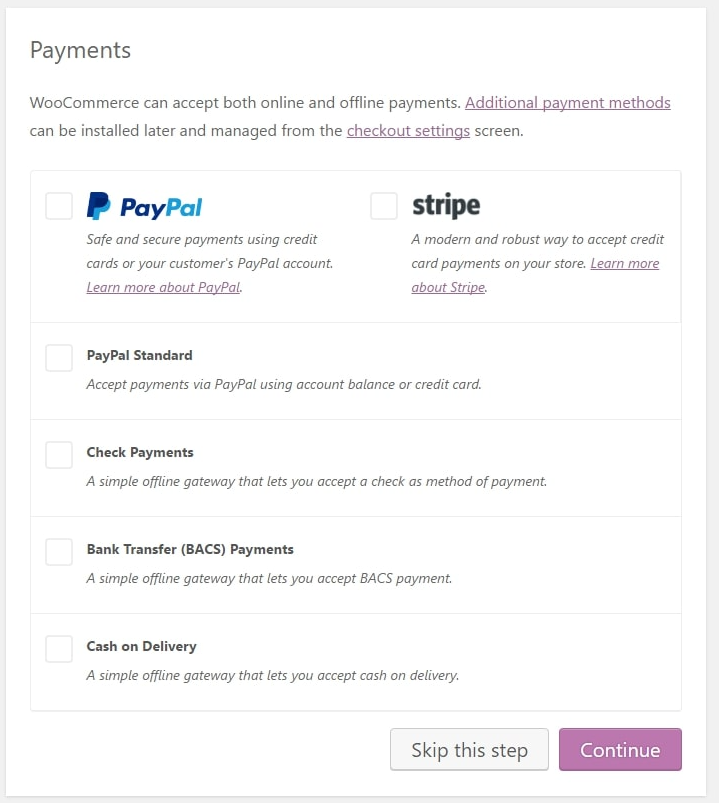
Payments
Being able to accept online payments is at the core of any e-commerce store, WooCommerce really offers a lot in terms of the available solutions.
Here’s what you can choose from:
Two of the most popular payment options are at the very top – PayPal and Stripe – it’s highly recommended that you integrate your site with both. Just click on their corresponding checkboxes.
You can also select other payment methods that seem to make sense. There’s going to be even more options available later on in your WooCommerce settings panel.
Note: In order to make online payments work, you need to sign up with either PayPal or Stripe separately. The settings in WooCommerce are only for integrating your existing PayPal and Stripe accounts with your new e-commerce website.
Again, click “Continue” when done.
The next step is just a confirmation screen that everything went well. At this stage, your basic site setup is done – you’ve just built a blank e-commerce store with WooCommerce!
The next step is adding products:
Your Store is Ready!
Congratulations your store is ready, now you can start adding products.
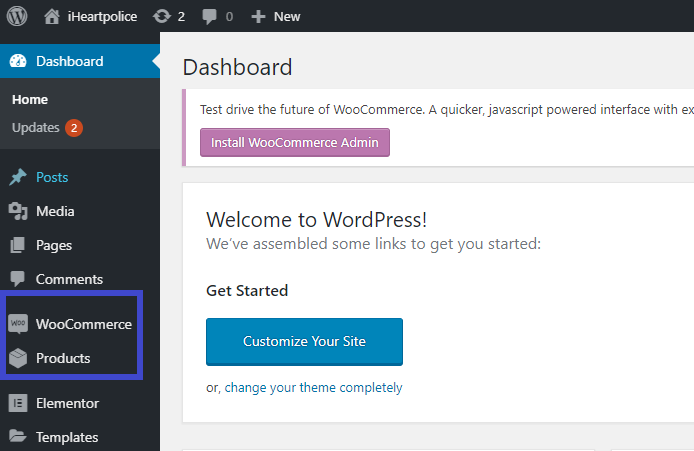
Now you’ll see two new tabs in your dashboard “WooCommerce” & “Products”.
Integrate CustomCat to your WooCommerce Website
Go to CustomCat.com > Integrations > WooCommerce > Login & Connect to WooCommerce Store
Click the “Connect” button above the WooCommerce Icon.
1. Upgrade your WooCommerce to the latest version
CustomCat connects to WooCommerce by using the WP REST API v3 feature. To connect your store to CustomCat you will need WooCommerce version 3.5.x or higher.
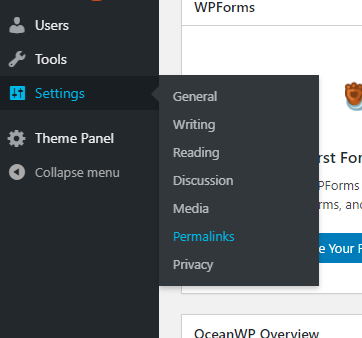
2. Make sure that permalink settings are not set to Default
WooCommerce WP REST API v3 currently works only when WordPress permalinks are enabled. In order to use the API, you need to make sure that the permalink setting is not set to the default value. The permalink feature depends on your server configuration – if URL rewriting is not available, then the permalinks will not work.
Open “Settings” > “Permalinks”.
Under “Common Settings” choose any link structure other than “Default” or “Plain”” in order for the WooCommerce API to work. (See example image)
CustomCat WooCommerce Setup
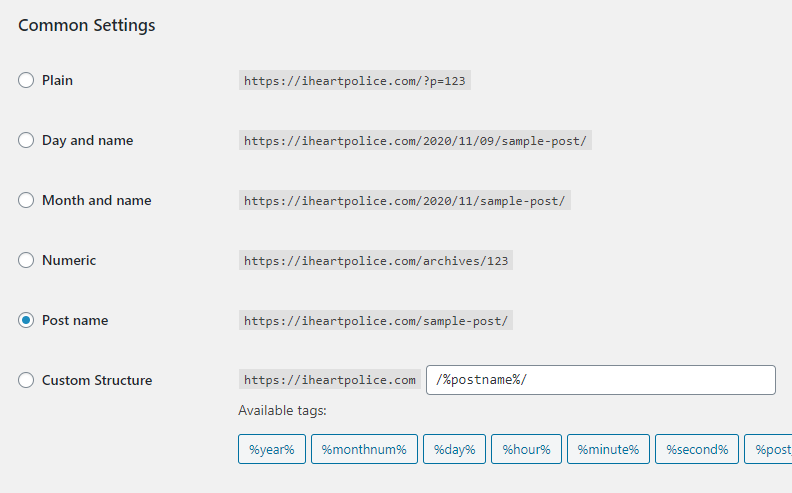
Click “Save Changes“.
*Please note: In order to use the latest version of the REST API you must be using:
- WordPress 4.4+.
- You may access the API over either HTTP or HTTPS, but HTTPS is recommended where possible.
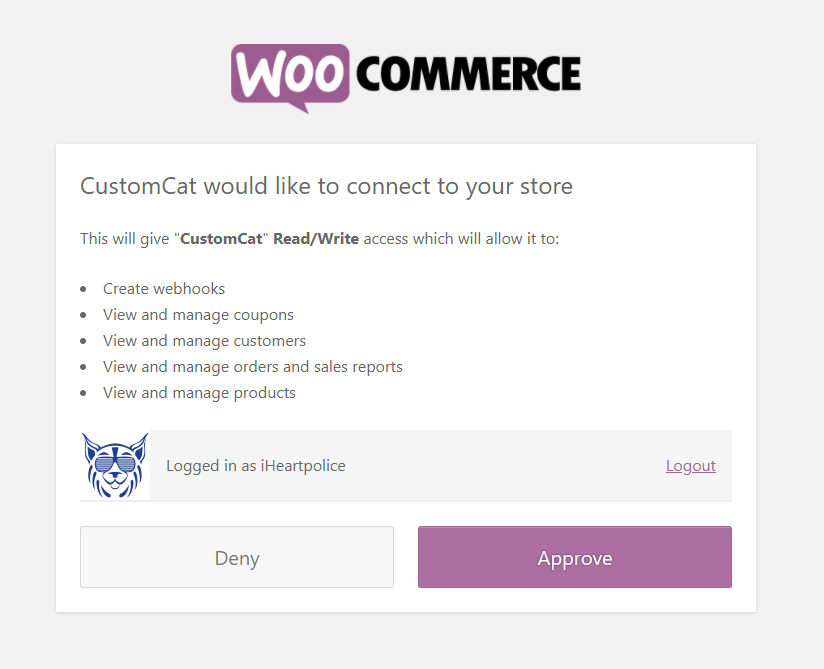
3. Connect the store to your CustomCat account
Click “Approve”.
If successful, you’ll be sent back to your CustomCat Stores page — from there, you can finish setting up your account settings.
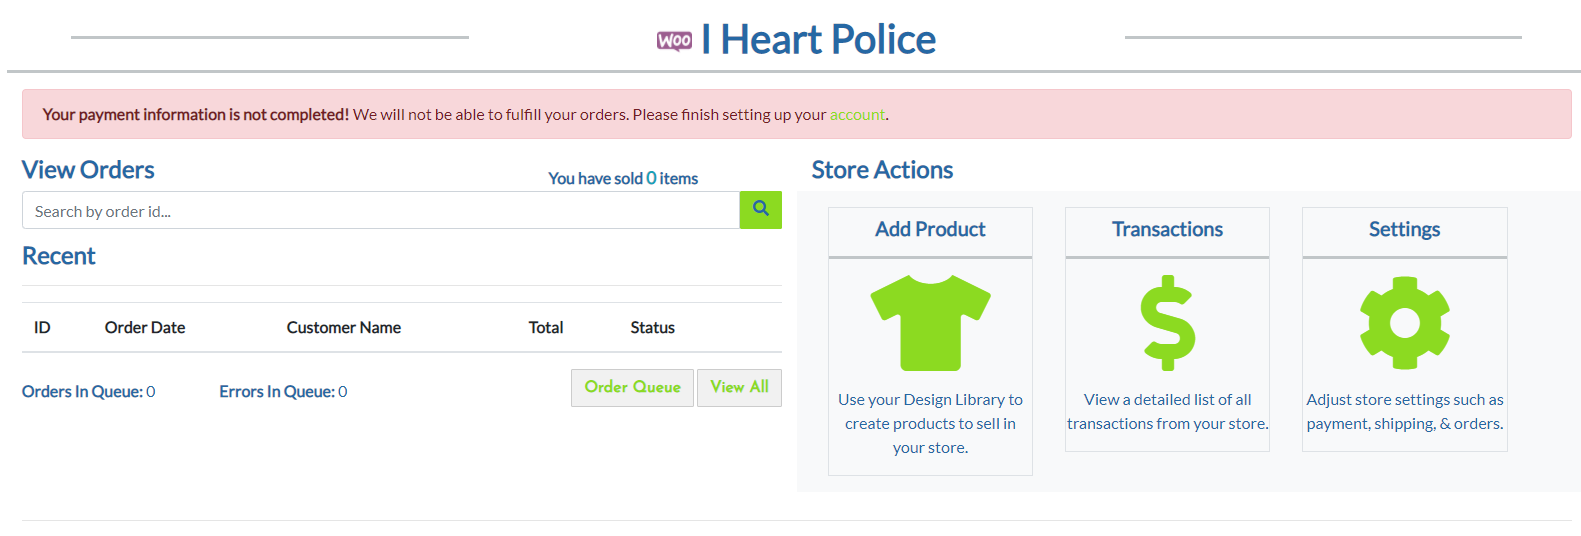
Once you have successfully filled out and saved your payment method and settings, your account will appear as “active”.
Congratulations! Now you are ready to upload designs and start creating products for your new WooCommerce store.
Creating Products for Your New WooCommerce Store
Learn how to upload designs to your Design Library here: How to Upload Designs into Your Design Library
Learn how to create and export products to your WooCommerce store here: Adding Products to Your Store.
You will not be able to export products until you have at least one design in your design library.
Featured Resource
2 thoughts on “Connect CustomCat to WooCommerce & WordPress”