
Getting Started with CSV

You can utilize CustomCat’s State-of-the-Art production facility no matter what cart or platform you use!
Follow the instructions below to take advantage of this bulk manual order process.
1. Activation
Once you have created a CustomCat account & you are logged into CustomCat.com, you will have the option to choose the CSV connect on your ‘My Stores’ page.

Next you will be prompted to ‘connect’ your store by entering your store name & a valid formatted URL.
Please note that this step is strictly for our records — no actual connection will be completed as CSV ordering is a manual feature, thus if you need to enter a fake url it is ok.

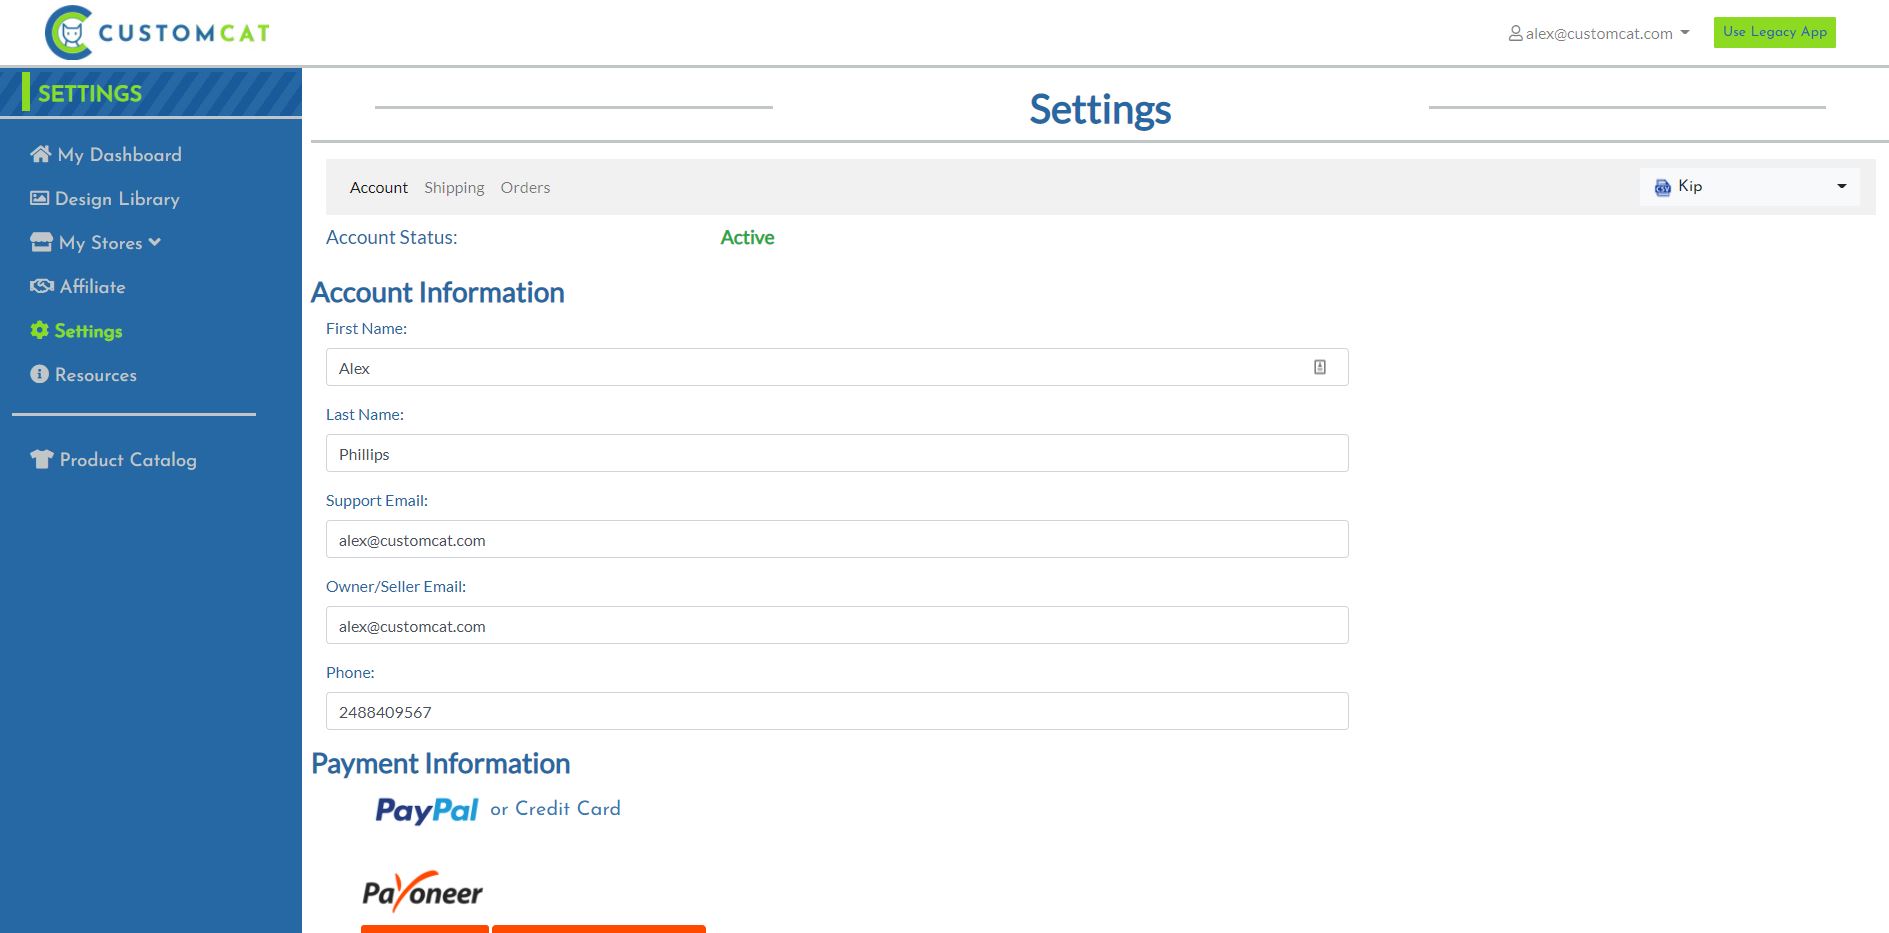
The next step is to activate your new store, which can be done by filling out your Account information in the Settings like all other integrations. After adding Payment Information & Shipping Label Information, click ‘Save Changes’ to activate your new store.
2. Setting up your CSV file (Documentation & Template)
Before you can submit an order using the Order by CSV feature, you need to create your CSV file. When importing a CSV file with your order data, it’s vital that the file is formatted with certain columns & column headers for our system to be able to read & process all order details. Otherwise, your order will be rejected due to a formatting error OR you will need to manually map your fields each time you import a CSV.
Please note: If CSV is formatted perfectly, your products will auto map & all you will need to do is click “process orders!”
** All columns listed below are required unless noted:
Column Headers:
OrderID – Must be unique per order. If multiple items are desired in an order, each item must be listed as its own line item (row) in the CSV & must share the same OrderID as any other items in the order.
LineItemID – (Only needed for DTG front + back designs otherwise Omit) – Must be unique for each line item in the order. If a product has both a front & back location, they need to share the same LineItemId & any other items in the same order need a different LineItemID.
Quantity – How many of each product is ordered.
ProductName – Name of the product, can be anything the seller wishes.
ProductId – Identifies the product from the CustomCat product catalog: https://customcat.com/catalog/
- ex: G500, CANLA15
Color – Identifies the color of the product from the CustomCat product catalog: https://customcat.com/catalog/
- ex: Black, White, Navy
- note – hover over the color swatch to see the color name
Size – Identifies the size of the product from the CustomCat product catalog: https://customcat.com/catalog/
- One-size products must be listed as “One Size”
- Other size options are: XS, S, M, L, XL, 2XL, 3XL, 4XL, 5XL, 6XL
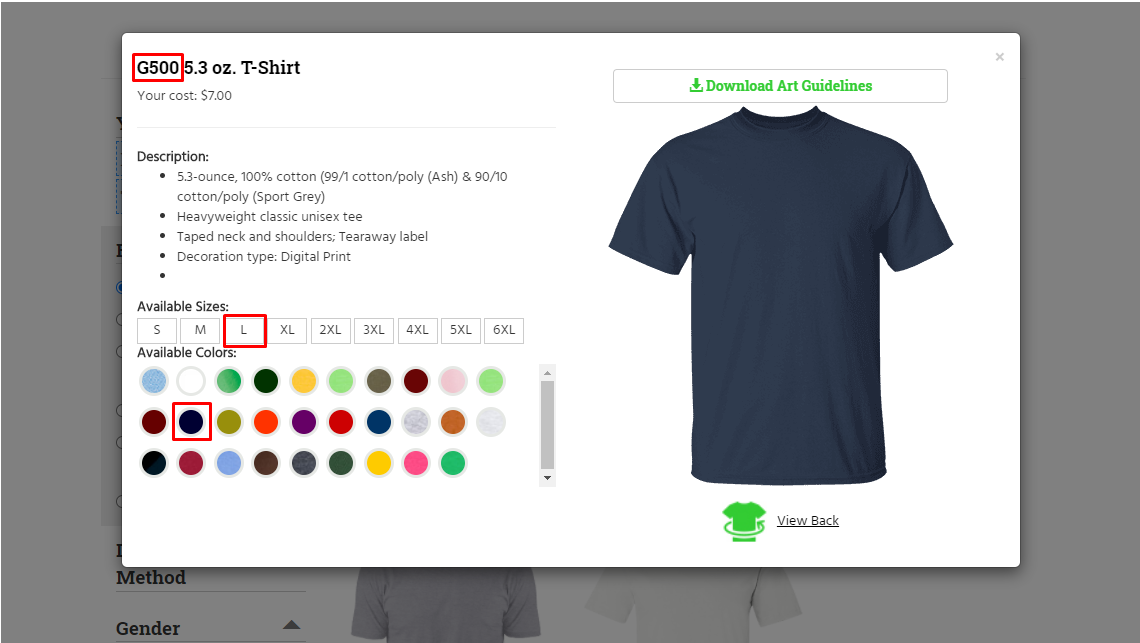
We will automatically map your product(s), color(s), size(s) if using the exact meta provided in the CustomCat catalog: https://customcat.com/catalog/
For example: G500 5.3 oz. T-Shirt – Navy – Medium
- ProductID = G500
- Color = Navy
- Size = L
DesignId – (Omit if using DesignURL) – Use this option when selecting your designs from the Design Library.
DesignPosition – (Omit unless designating a Front or Back DTG) – The default is Front where applicable & no other entries such as Left Chest, Back only, etc. will be recognized by our system.
DesignURL – (Omit if using DesignID) – Bypass the Design Library if you are hosting & storing your own image urls.
- Filetype must be .png or .jpg
- File cannot be password protected & must download automatically when link is opened.
- Dropbox URLs must include the suffix ‘dl=1’ to be downloadable.
ExactArtwork – (Only use when using DesignURL) – There are only two options ‘TRUE’ or ‘FALSE’.
TRUE – If True, we will NOT trim the transparent space in your artboard & will respect the files dimensions. The artwork is positioned based on the placement of the design inside the Art Board, with negative space observed.
- Exact Artwork dimensions & placement observed.
- Must submit art file with appropriate artboard size based on product art guide dimensions listed below.
- Adult T-Shirt: 14 x 16 inches @ 300 dpi.
- Adult Hoodie: 12.5 x 11 inches @300 dpi.
- Youth Apparel: 10 x 10.5 inches @300 dpi.
- Dye Sublimation Products: follow art guidelines
- Note – DesignURL & ExactArtwork not available for Embroidery products. Use DesignID & Design Library instead.
- Note – No mock up preview available & no option to adjust the placement of the design.
FALSE – If False, we will trim the transparent space in your artboard & default the positioning according to CustomCat presets. You will have the option to adjust the position during the Mapping page.
SKU – (Optional) – If also using Shopify, WooCommerce, Etsy or any other CustomCat integration, you can use the exact CustomCat sku to auto map products from your store that need to be manually ordered. If you are not using an exact match from your Shopify, Woo, Etsy, etc. then you should omit this column.
All the customer’s shipping info needs to be included. If the order errors it is typically due to City/State/Zip not matching. Use Smarty Streets Address Validation to correct the order & submit again – https://smartystreets.com/products/single-address?address-type=us-street-components&street=&street2=&city=&state=&zipcode=
ShipToFirstName
ShipToLastName
ShipToAddress
ShipToAddress2
ShipToCity
ShipToZip
ShipToState
ShipToCountry
ShipToPhone
ShippingMethod
CustomerEmail
3. CSV File Mapping & Submission
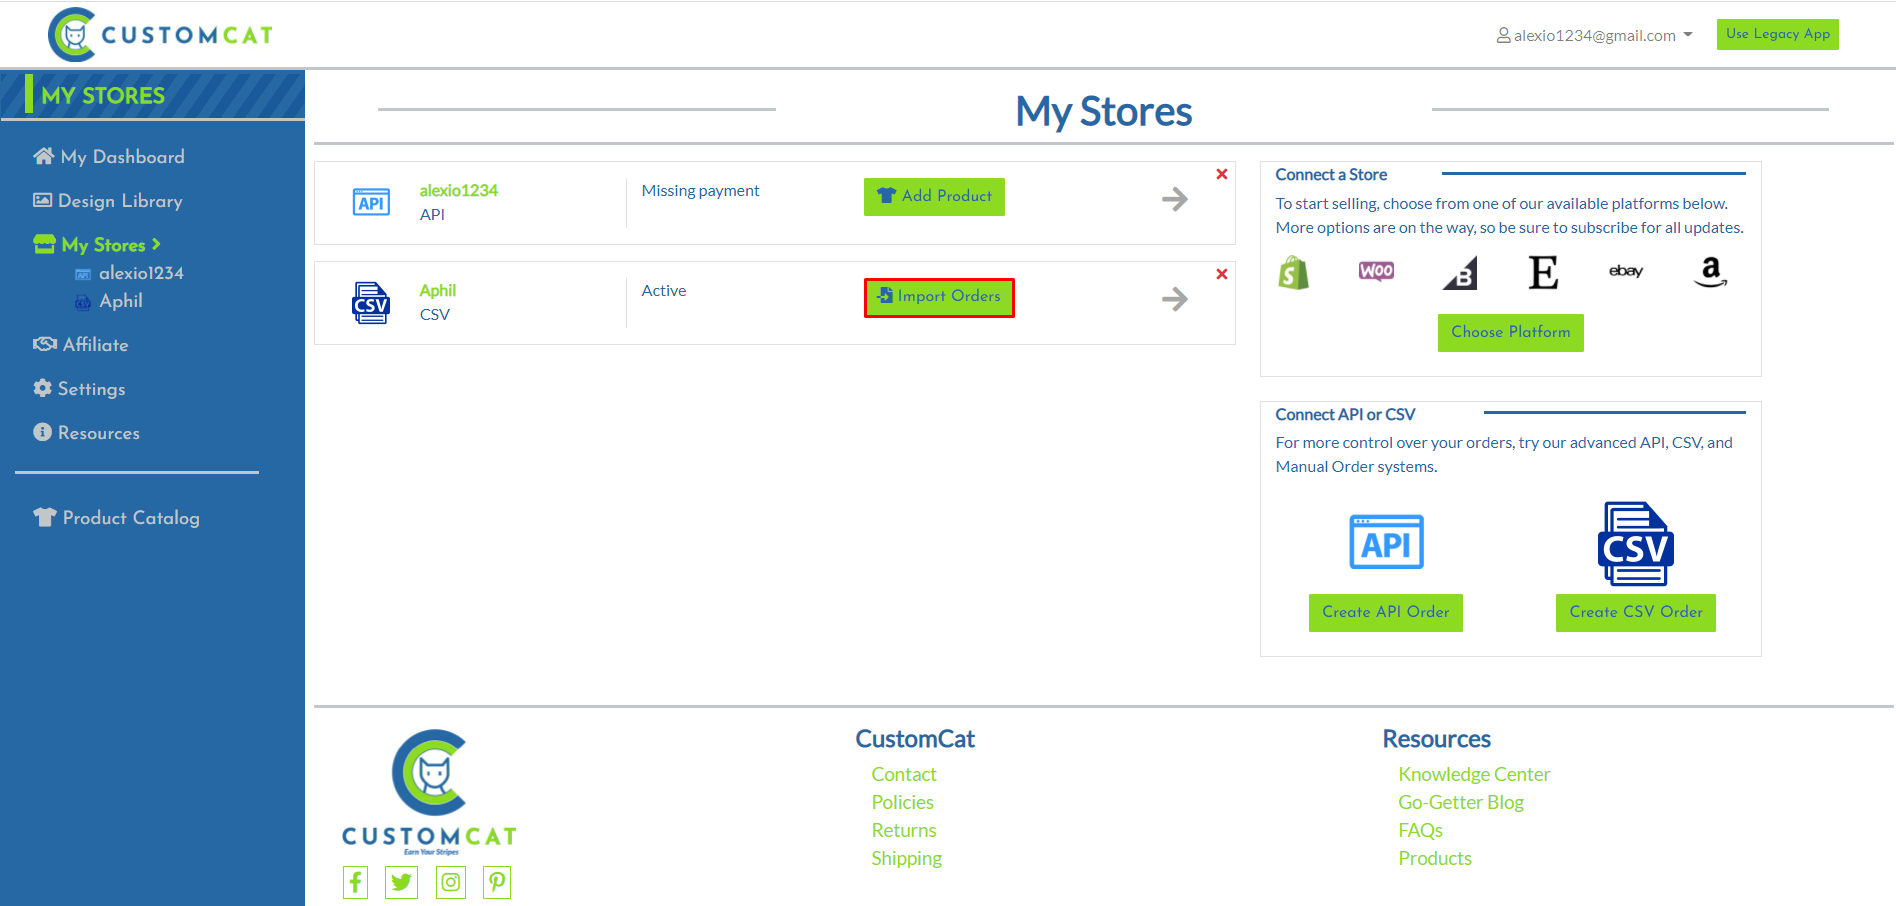
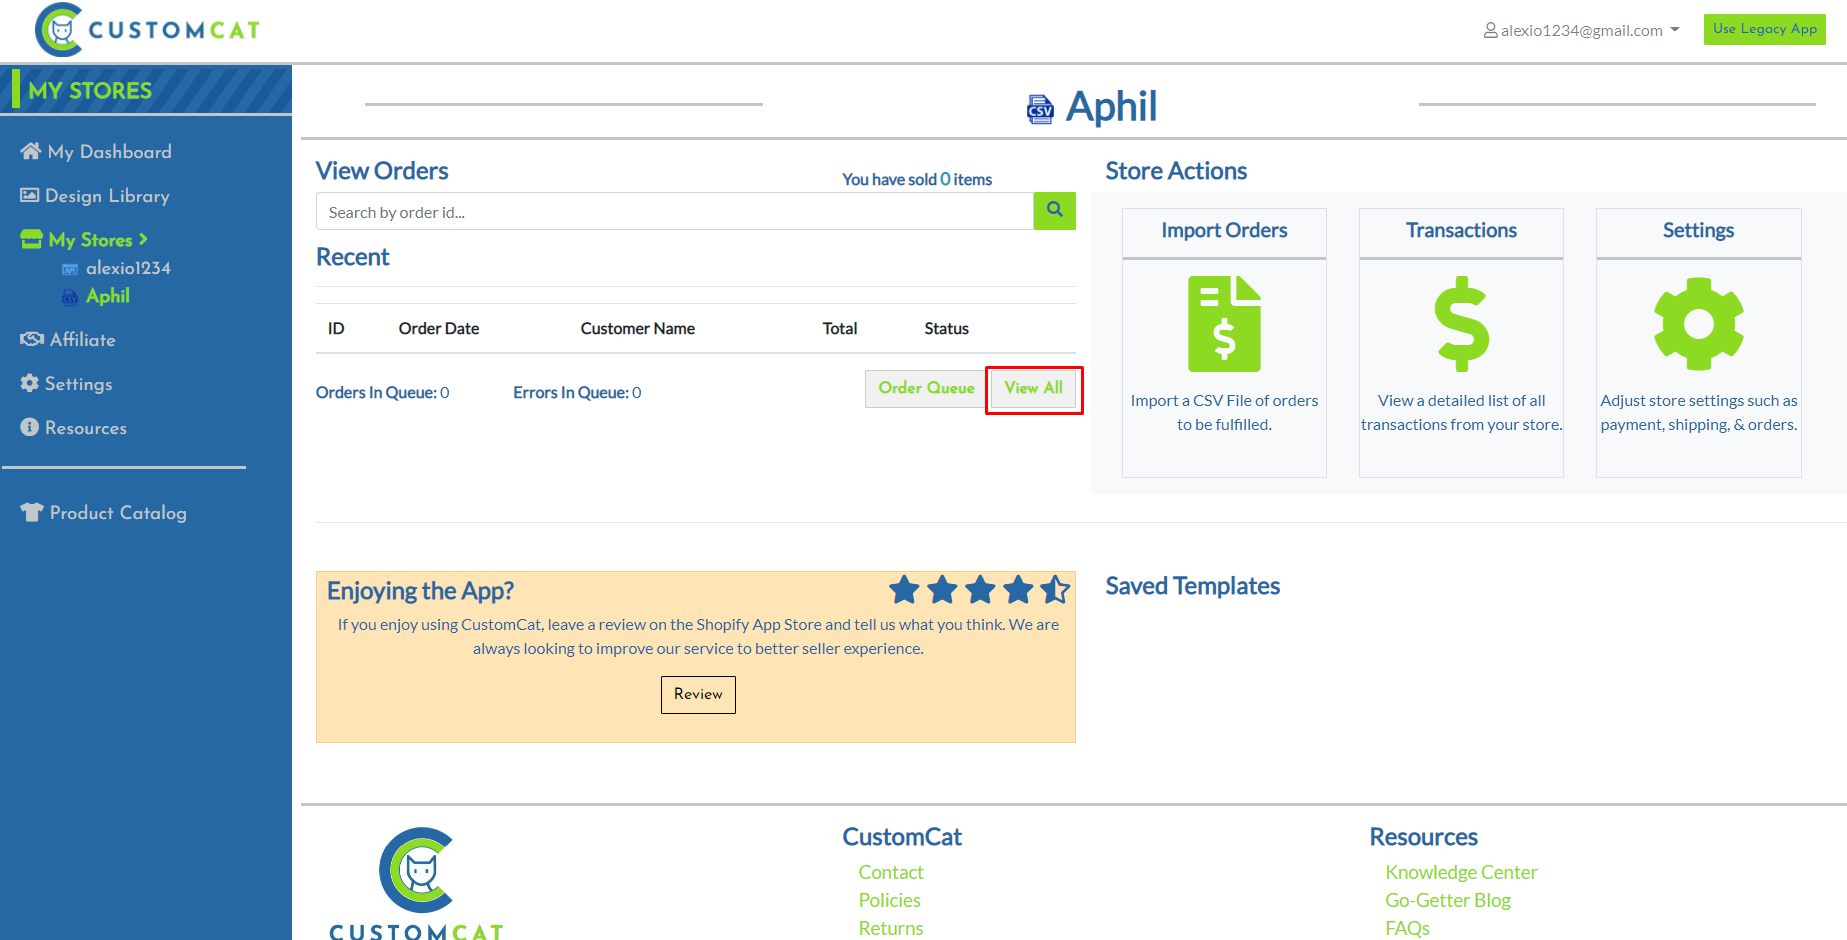
Once your CSV account is activated & you have your CSV file formatted correctly, you can then import your CSV file by using the Import Orders button in My Stores:
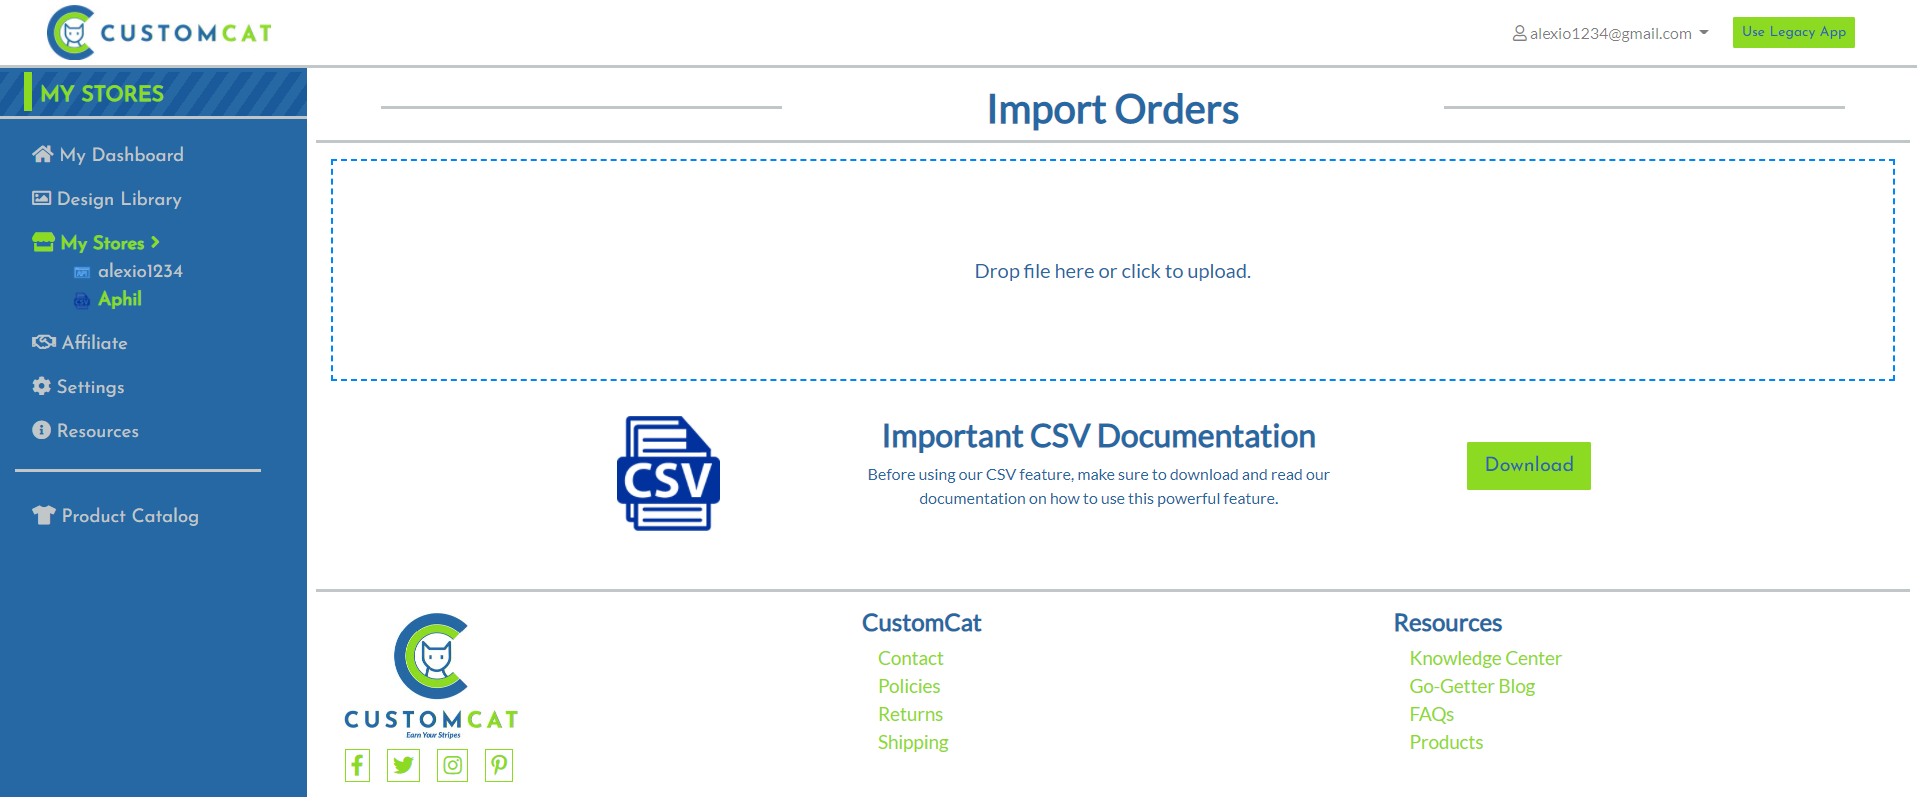
You will then be prompted to drop in your file or click to upload it from your computer:
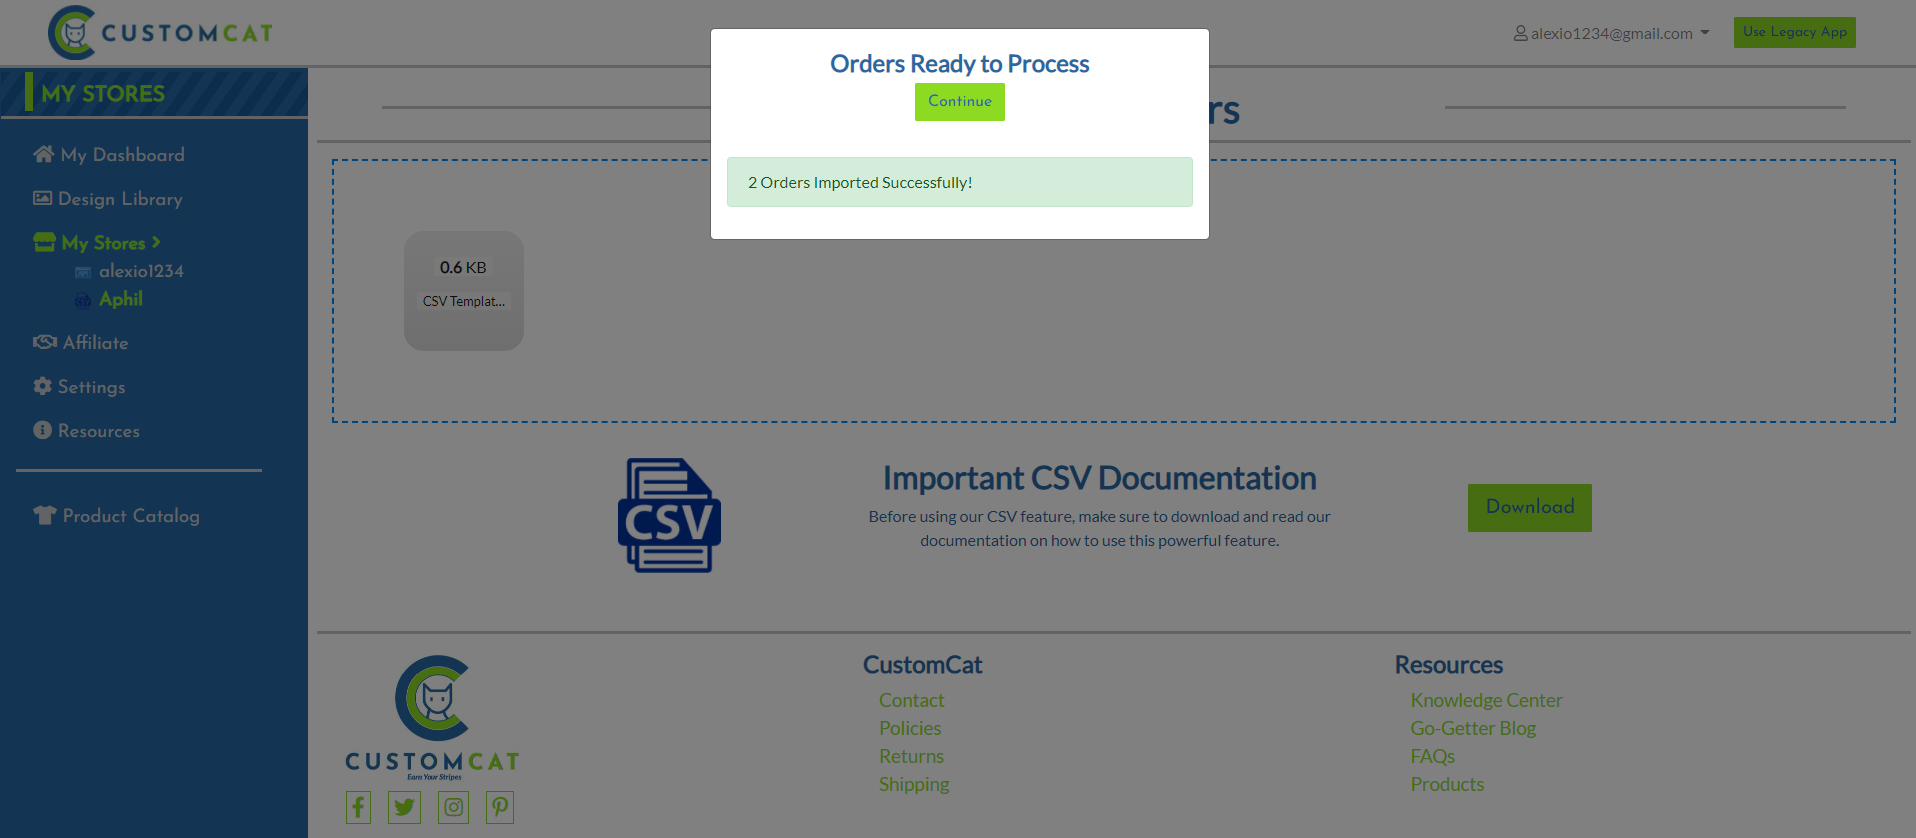
If the file was formatted correctly, a notification popup will display showing how many orders were imported successfully OR if there were any errors.
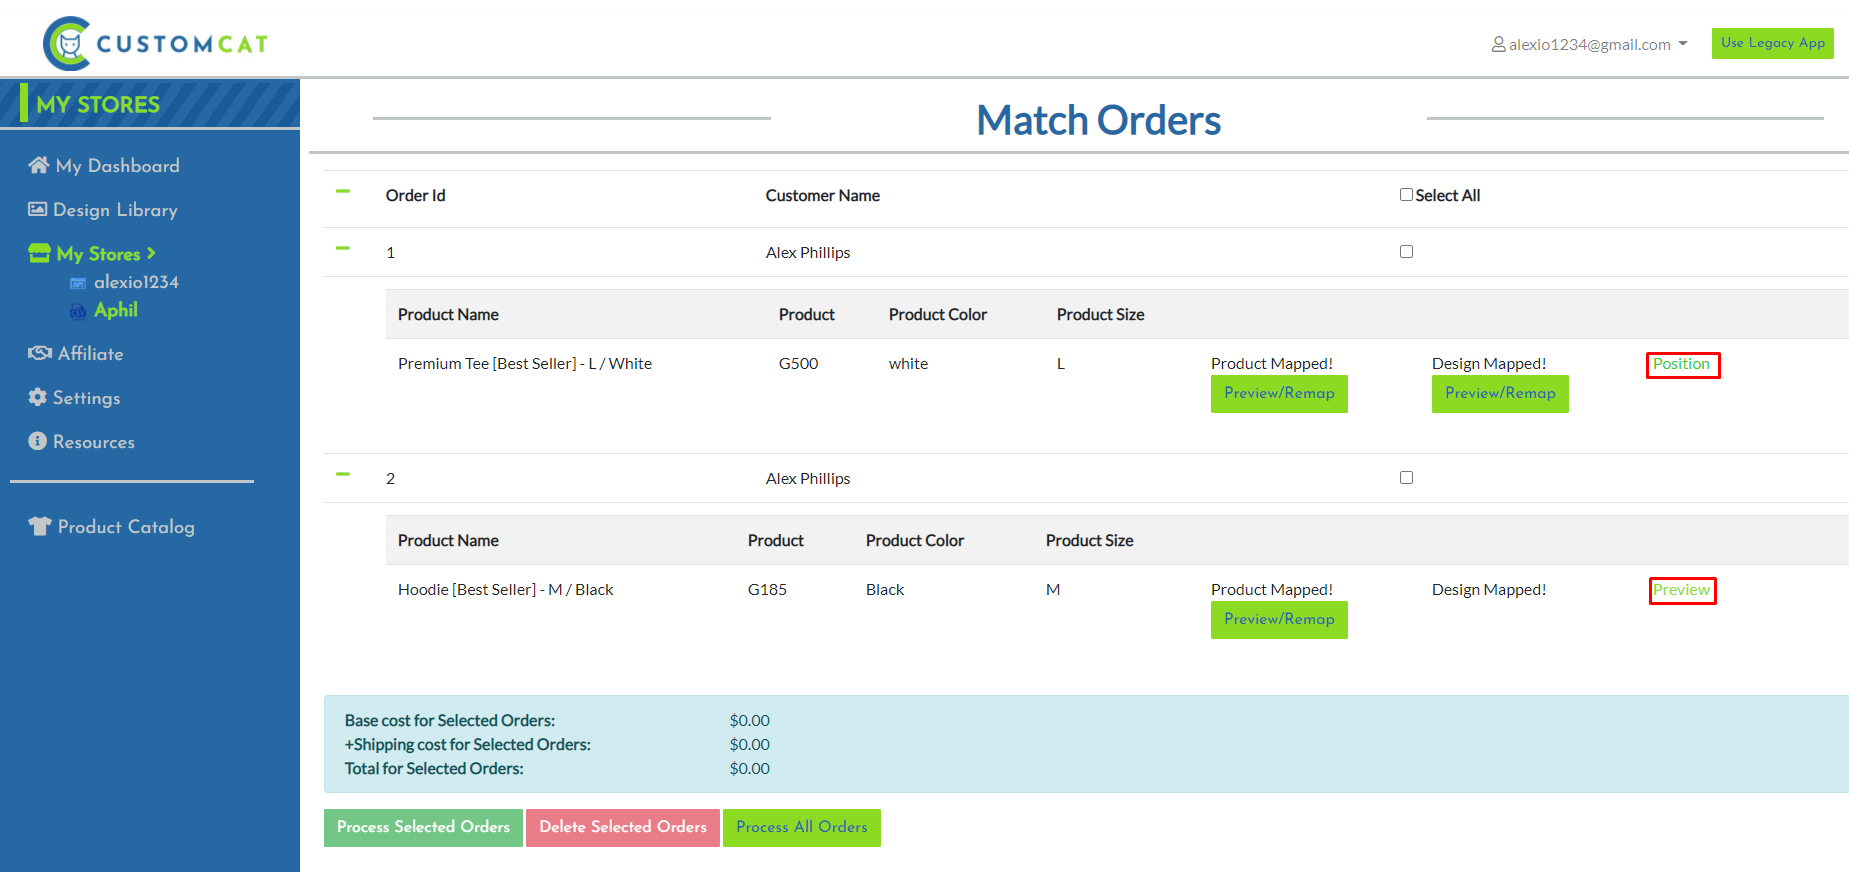
After clicking “Continue,” all your orders plus all items in each order will be listed in the mapping step. If you have successfully submitted an exact match with our product catalog & submitted a design url or design id that our system recognizes, all of your products & designs will show as mapped & you will be ready to process your orders. However, if there was not an exact match or if you wish to remap your products or designs, you will need to use the ‘Select/Remap Product/Color/Size/Design.
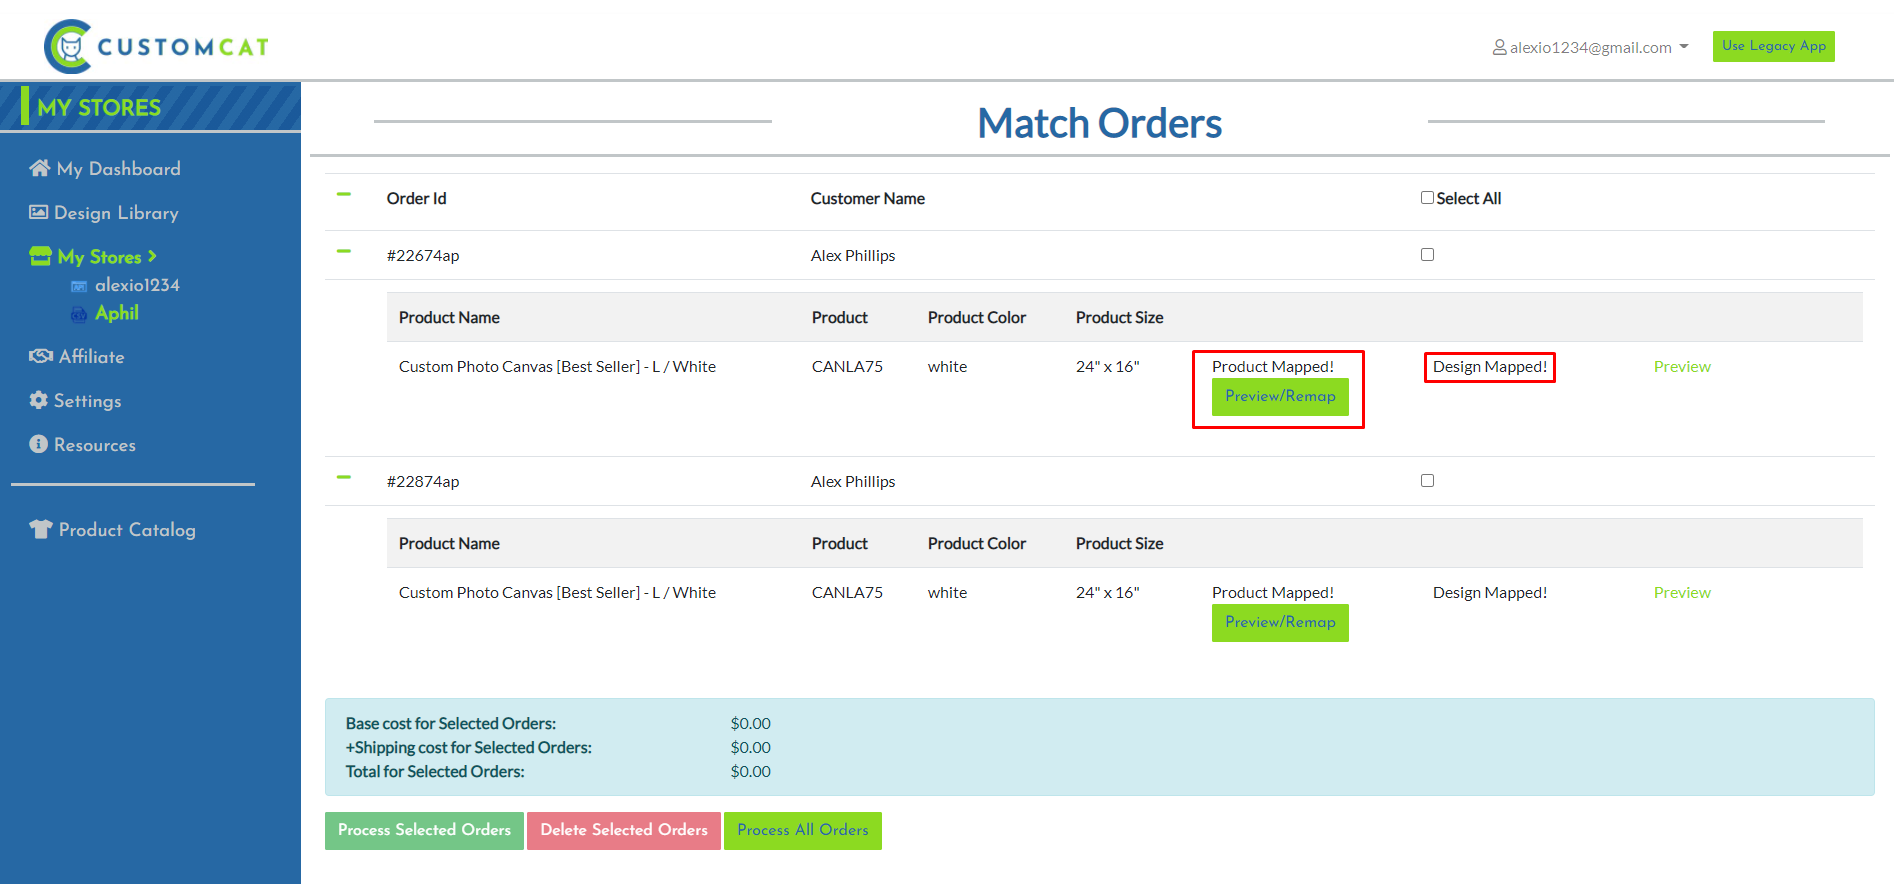
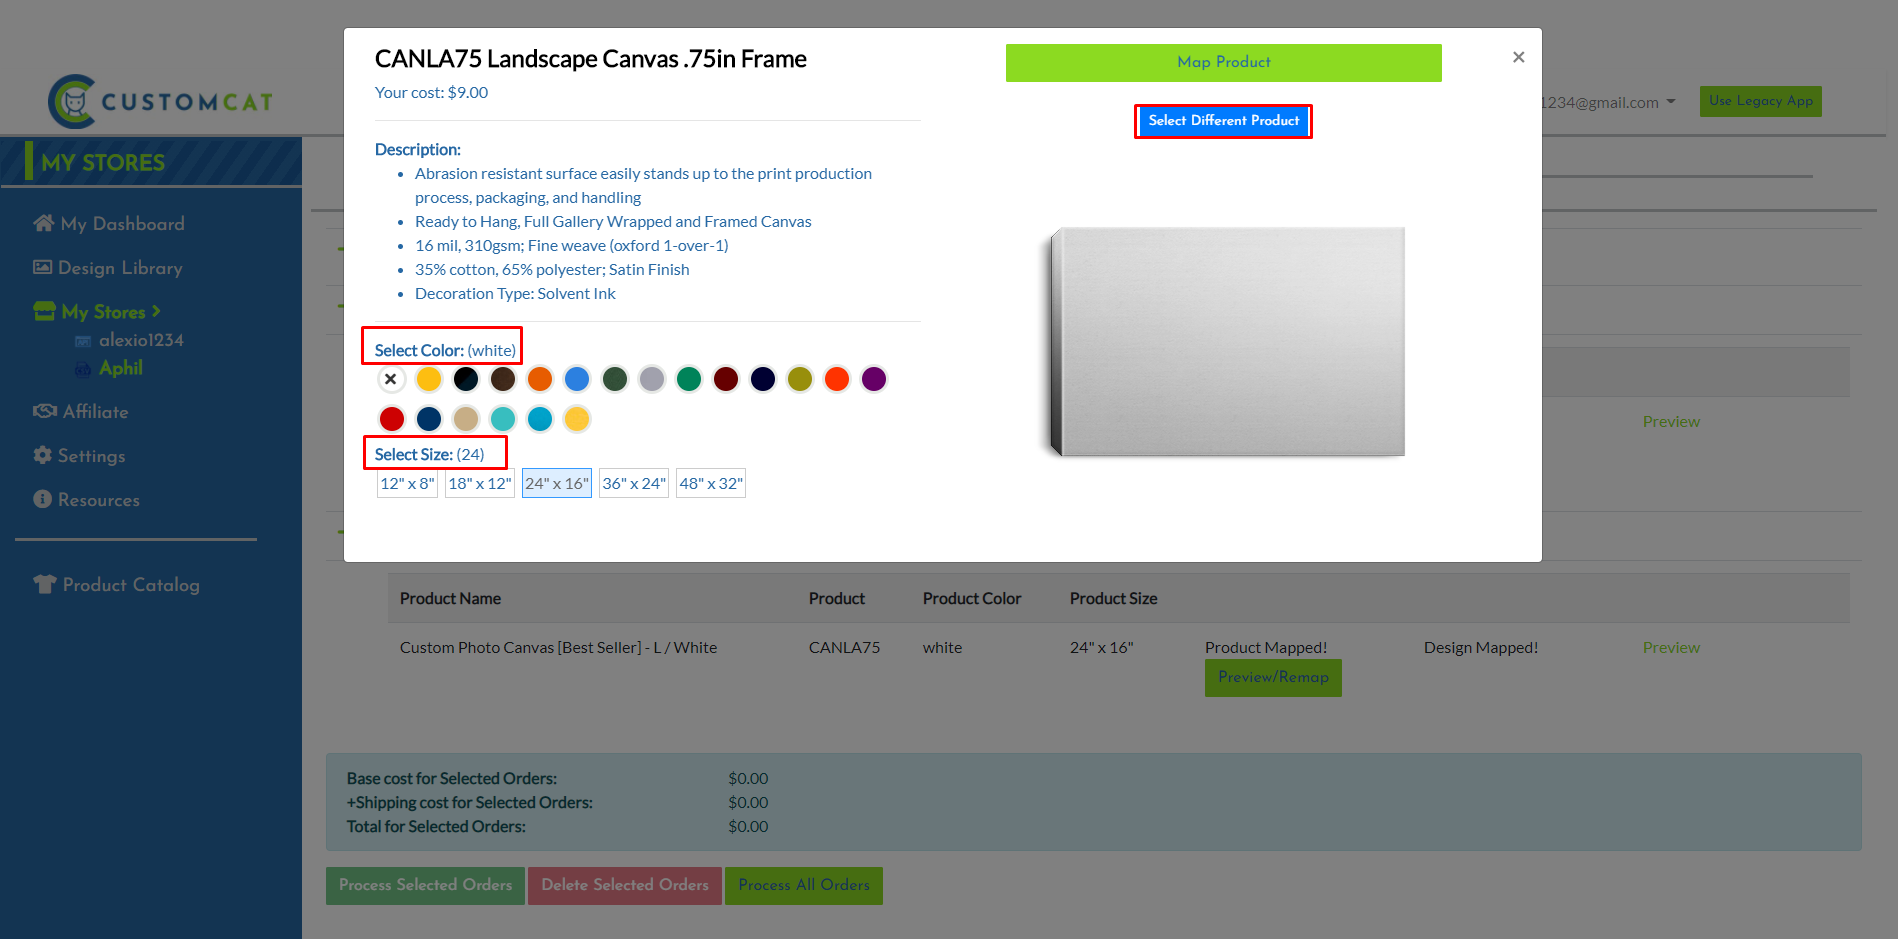
When you click to ‘Select Product’ or ‘Preview/Remap’, you will be directed to our catalog where you can choose the desired product/size/color that you wish to order.
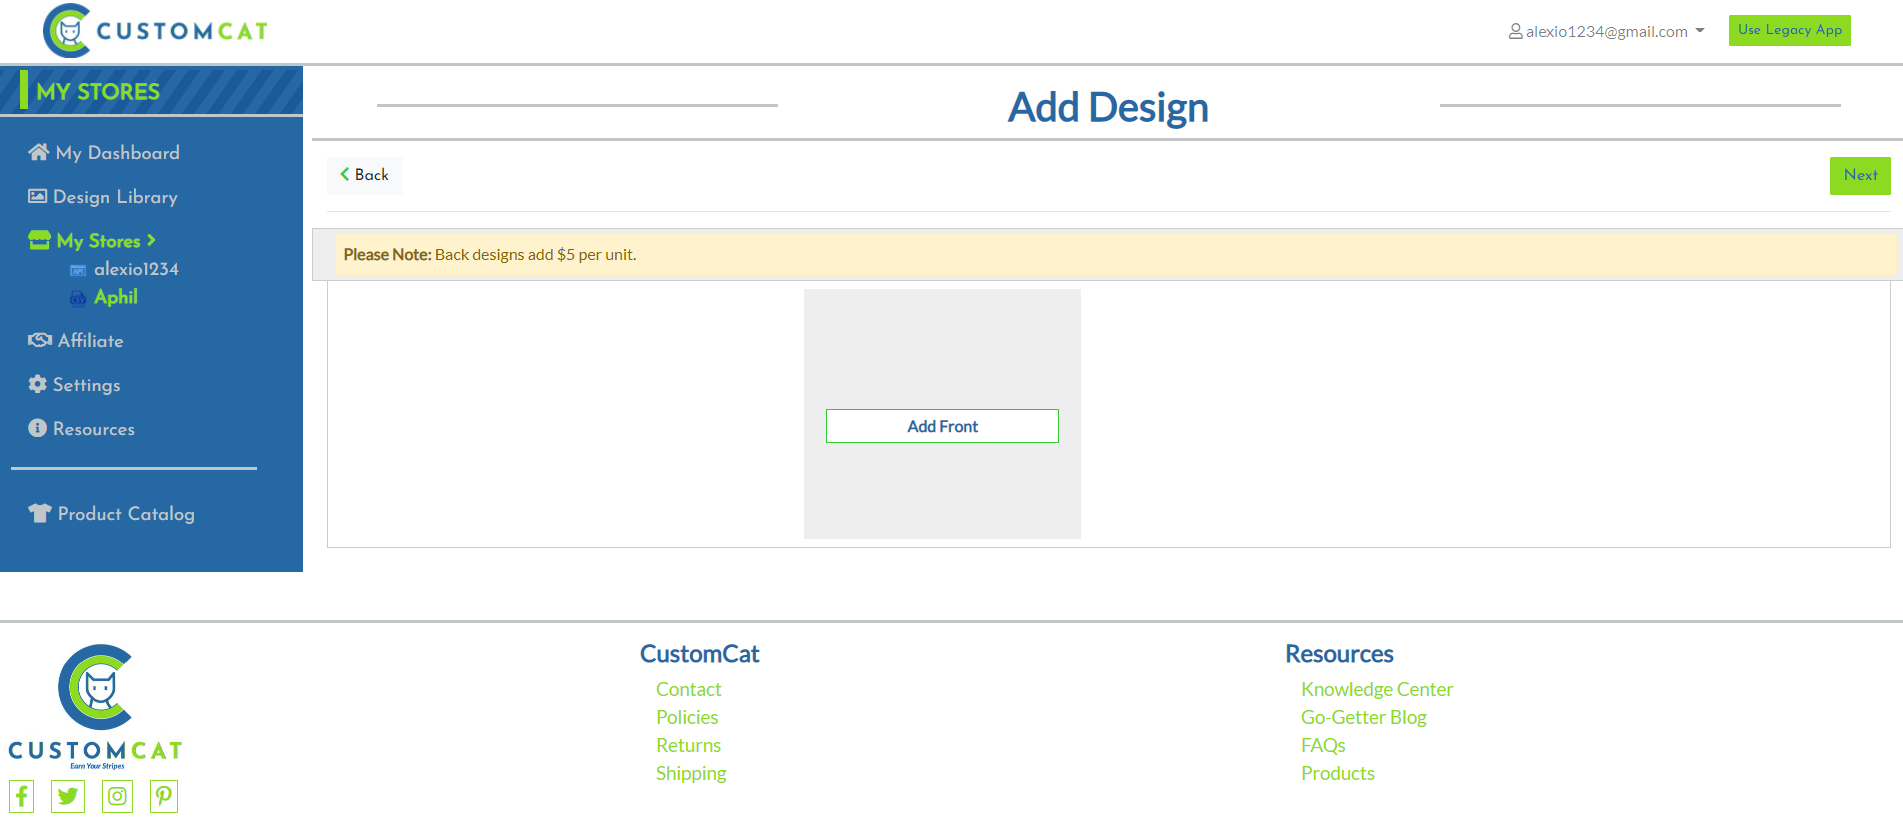
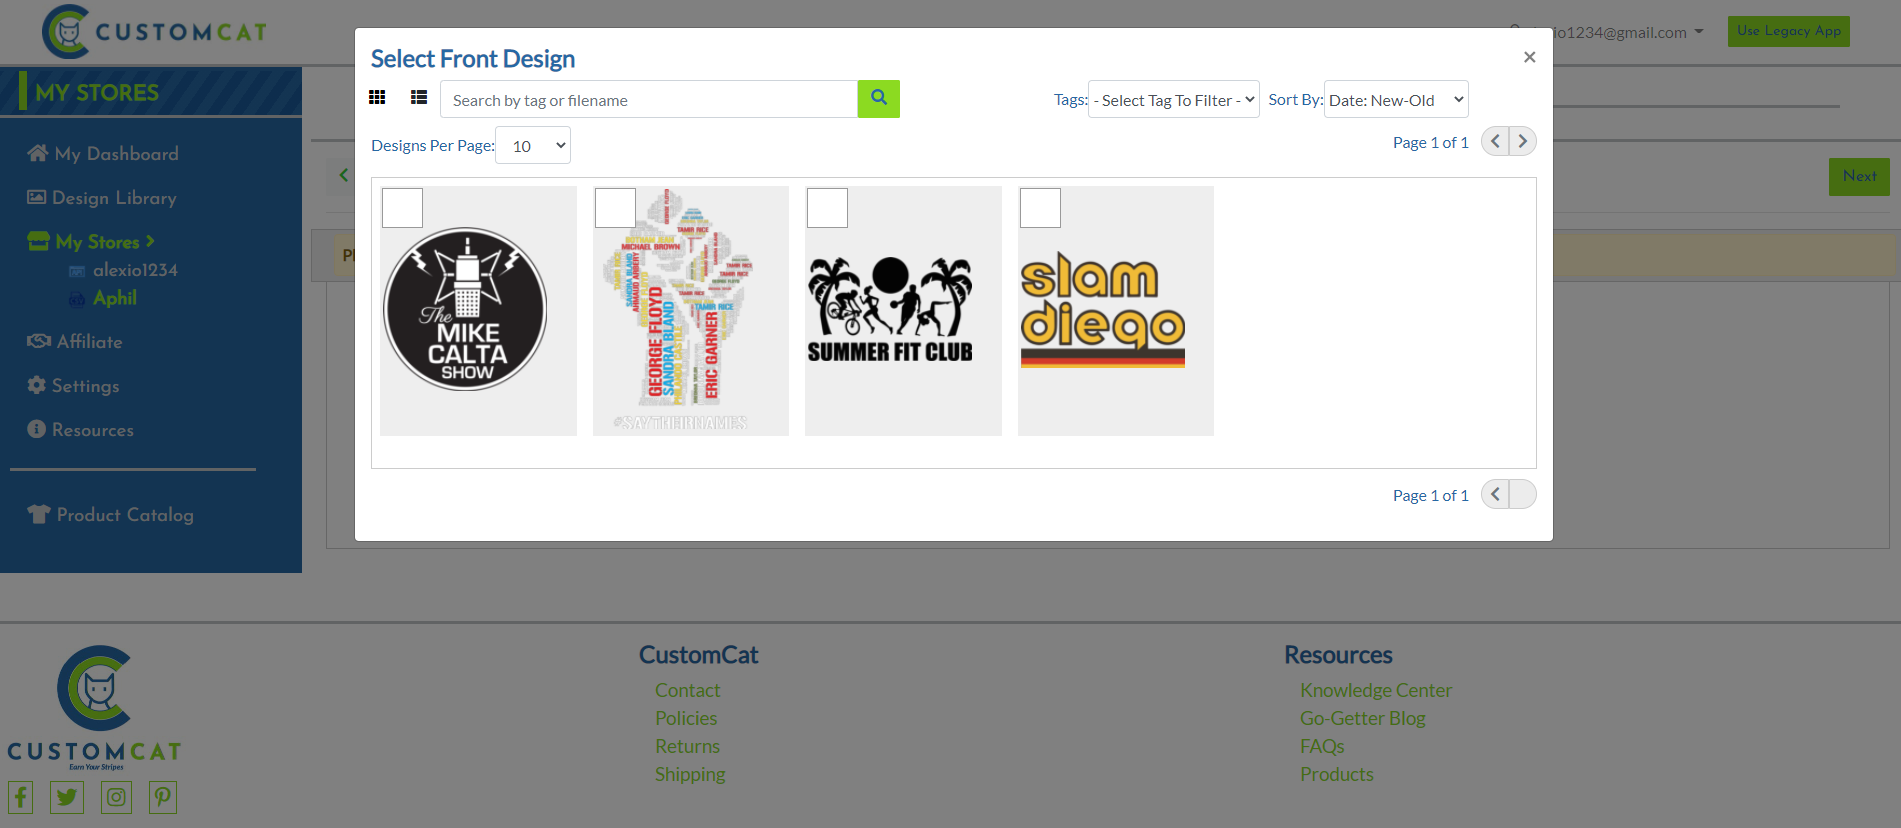
When you choose to ‘Select Design’ or ‘Preview/Remap’, you will be prompted to add a design(s) from your library (note this is not applicable when using a DesignURL):
Once a product/design has been mapped, there will be a Position button that appears next to it. This is where you can custom position the design placement. Note – if using a DesignURL & ExactArtwork ‘True’, the Position option will be replaced with a Preview & you will only be able to preview your design url.
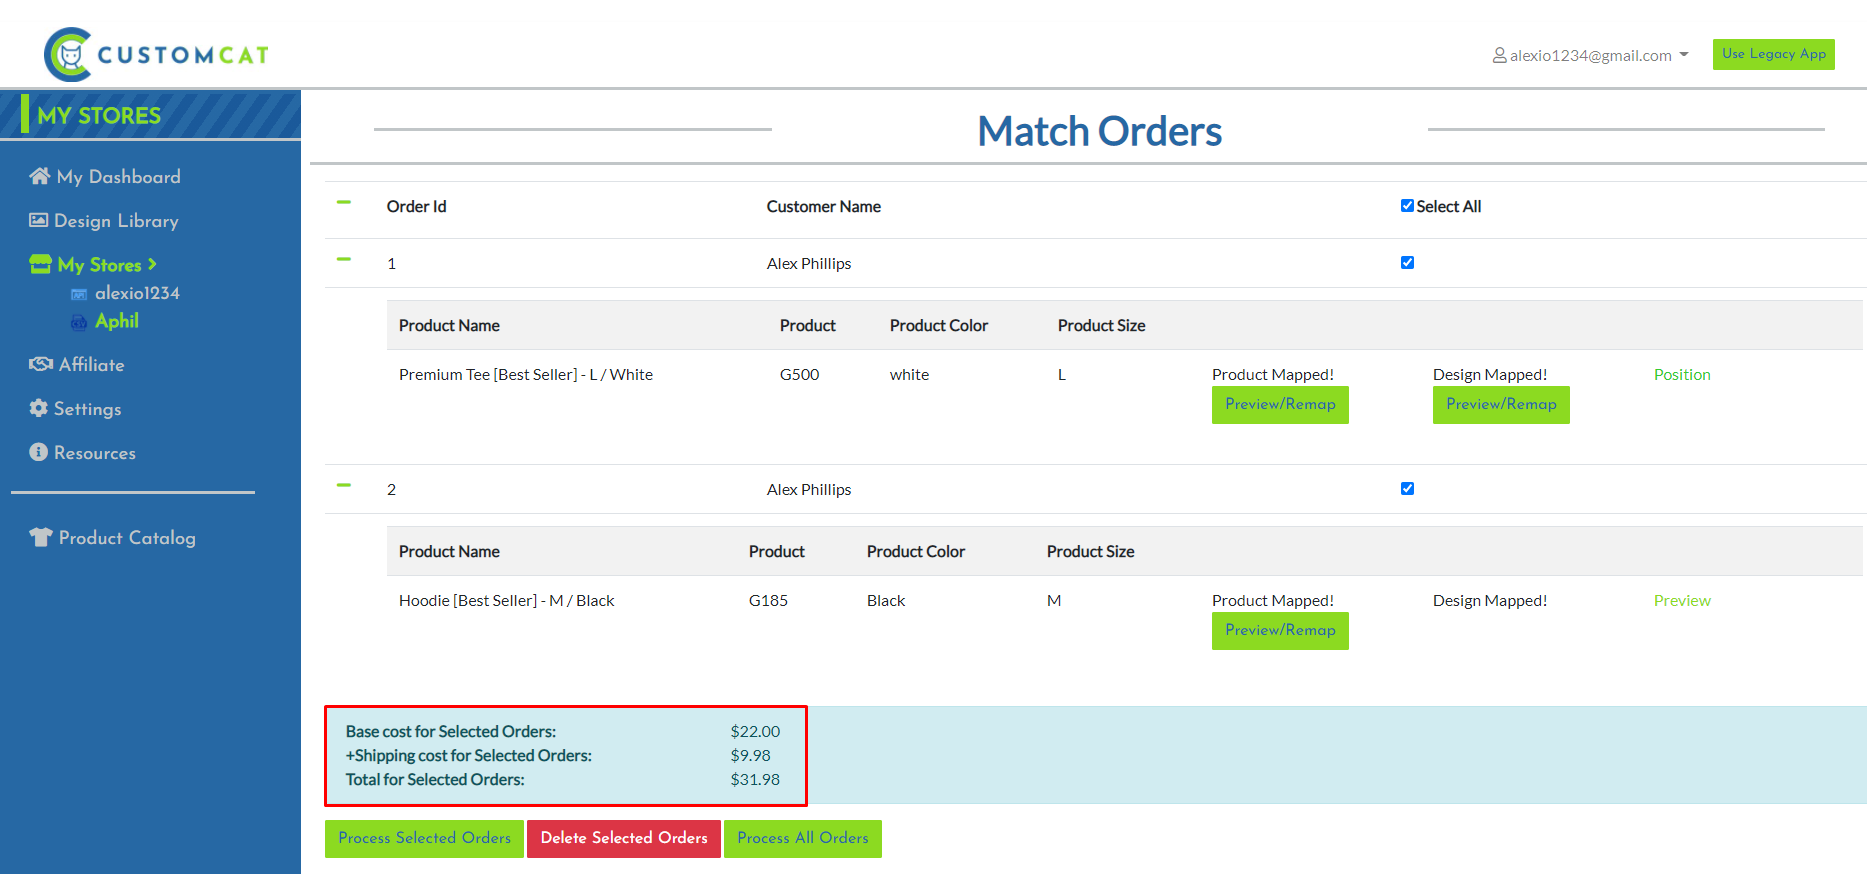
Only after all products & designs have been mapped, you can submit & process your order(s) into production. Use the checkbox to select which orders need to be processed, & the total price for the selected orders will be listed at the bottom.
If the order was successfully processed, you will have a confirmation message display: Orders Processed!
At this point the selected orders have been processed, you have been charged & the orders will display in your Processed Orders in your Store Dashboard.
CSV Upload Tips & Tricks:
To keep the leading zero intact, you will need to highlight the ‘ShipToZip’ Column > right-click > Format cells:

The format dialog box will appear. In the Numbers tab, select Special as the category, & Zip Code in the type section.
Select OK.

Make sure to save your CSV sheet before submitting the CSV order into your CustomCat account.
*Please note – If you need to re-open & make any changes to the CSV file before submission, you will need to repeat the steps above to keep the leading zero in the zip code intact.
Good Luck & Happy Selling!!!
Featured Resource

4 thoughts on “Getting Started with CSV”