
[Tutorial] CustomCat’s Etsy Integration

It’s true — you’re not dreaming — you can integrate our fulfillment with your Etsy shop! We’re excited to be able to offer seamless integration with Etsy’s global marketplace to help our sellers expand their businesses into a brand new pool of customers.
Alright, let’s get you started. Here’s everything you need to know to get your Etsy shop off the ground. To maximize your growth on Etsy, check out our curated list of Etsy Best Practices.
About Etsy:
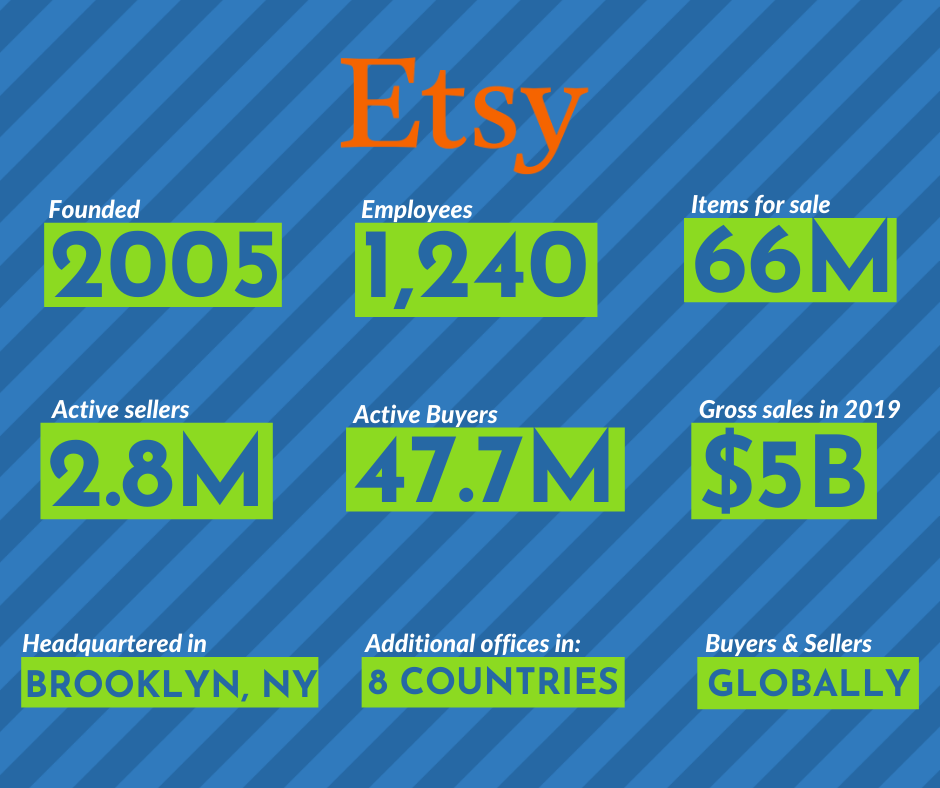
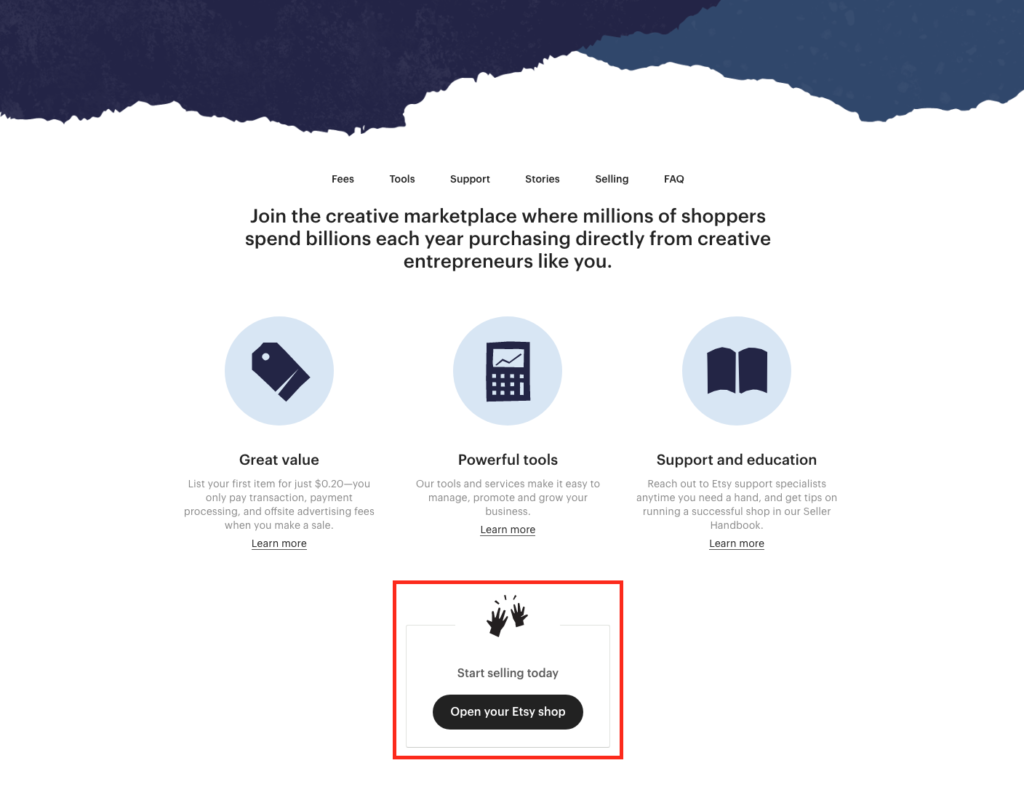
Etsy is a global marketplace connecting consumers with a myriad of unique products from sellers all over the world. Etsy offers a free, safe, and secure platform on which to host your store, charging a minimal 20¢ fee per listing. Additional options for paid subscriptions are available to expand your options for shop customization.
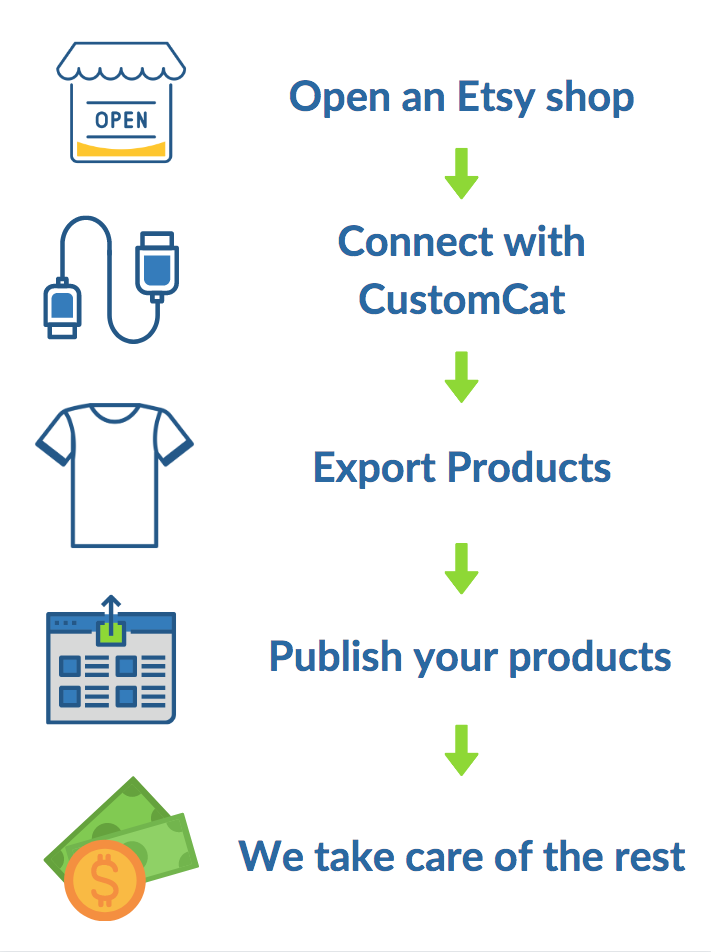
How the Integration Works:
How to open an Etsy Shop:
Setting up an Etsy Shop is super simple. Follow these five steps and you’ll be well on your way to linking your account with CustomCat. If you’ve already got your own Etsy Shop, you can jump ahead to the next step.
Step 1: Shop Preferences – Choose your language, country, and currency.
Step 2: Name your shop – Your shop name will appear in your shop and next to each of your listings throughout Etsy. After you open your shop, you can change your name only once so make sure it’s something creative and catchy.
Step 3: Stock your shop – Etsy requires at least one published listing for store activation. You can add more products directly from your CustomCat app once your store is open. Here you will also add photos of your products, describe the listing, determine inventory and price, and decide on shipping details.
Step 4: How you’ll get paid – Enter your banking information so Etsy can pay you for each sale you make.
Step 5: Set up billing – Add a credit card to your account so Etsy can charge you the 20¢ for each listing you publish.
Now you’re ready to open up shop!

How to Connect your Etsy Account to CustomCat:
It is absolutely vital that you complete the store set-up process on Etsy prior to attempting to connect your CustomCat account. Failure to complete Etsy’s required set-up steps (including publishing a test listing) will result in a failed connection.
Step 1: Login or Sign Up with CustomCat

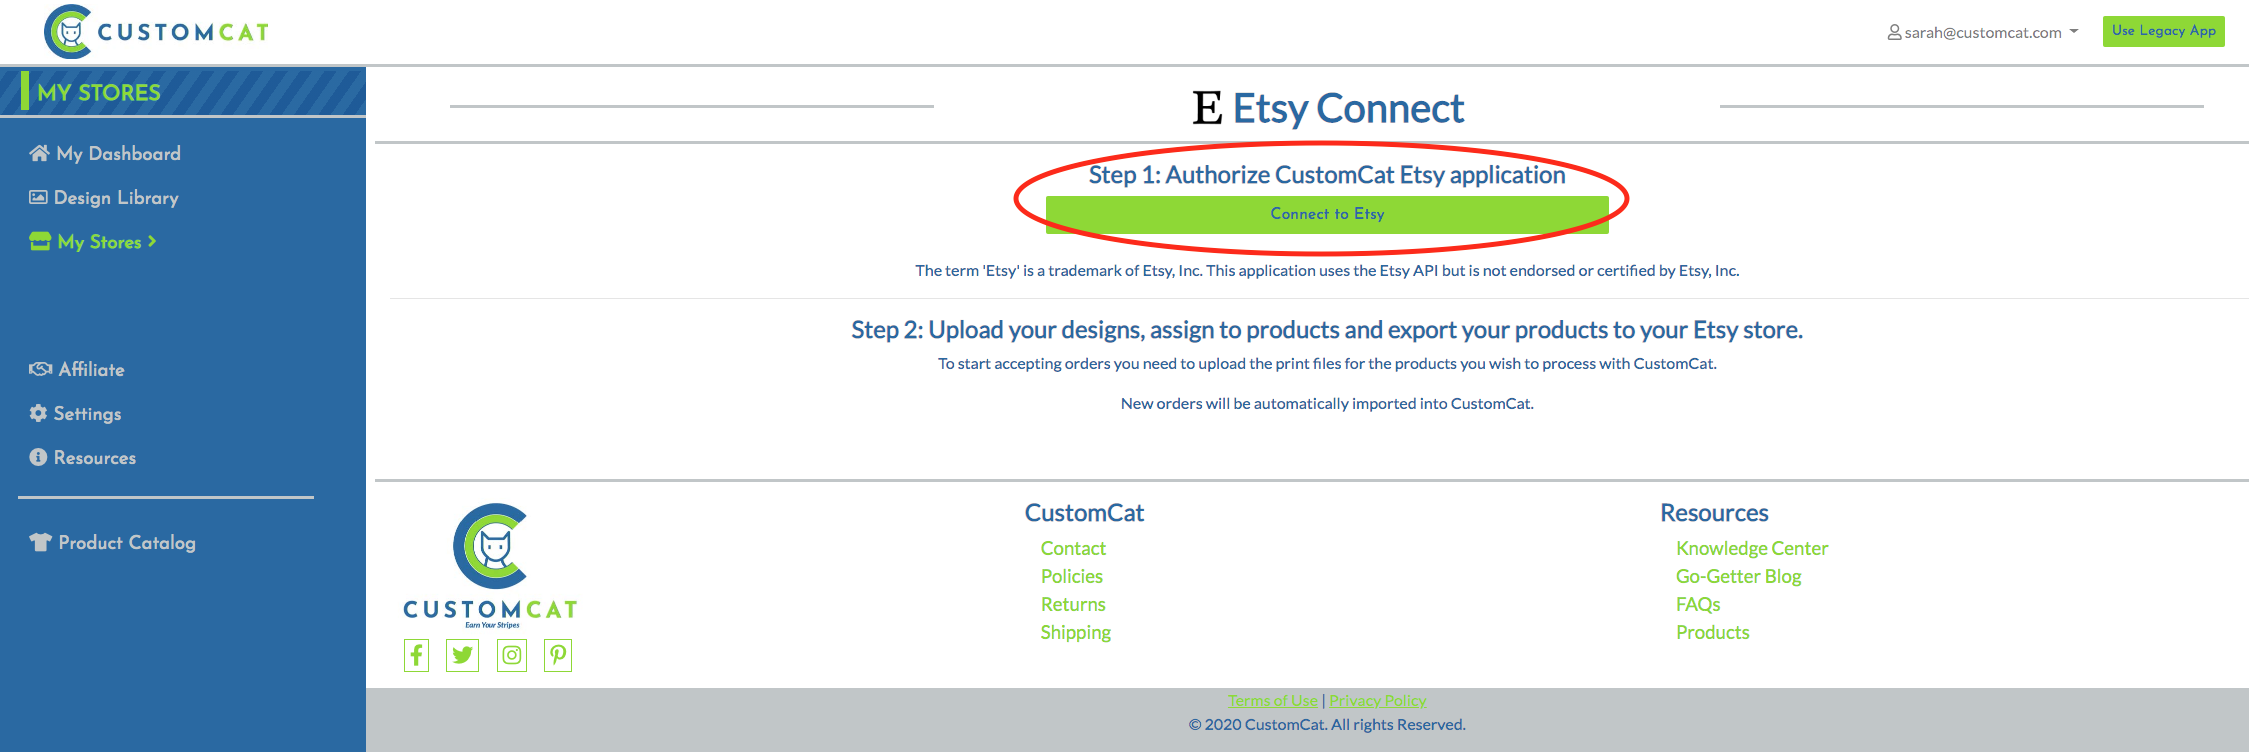
Step 2: Click “Connect” in your “My Stores” Dashboard
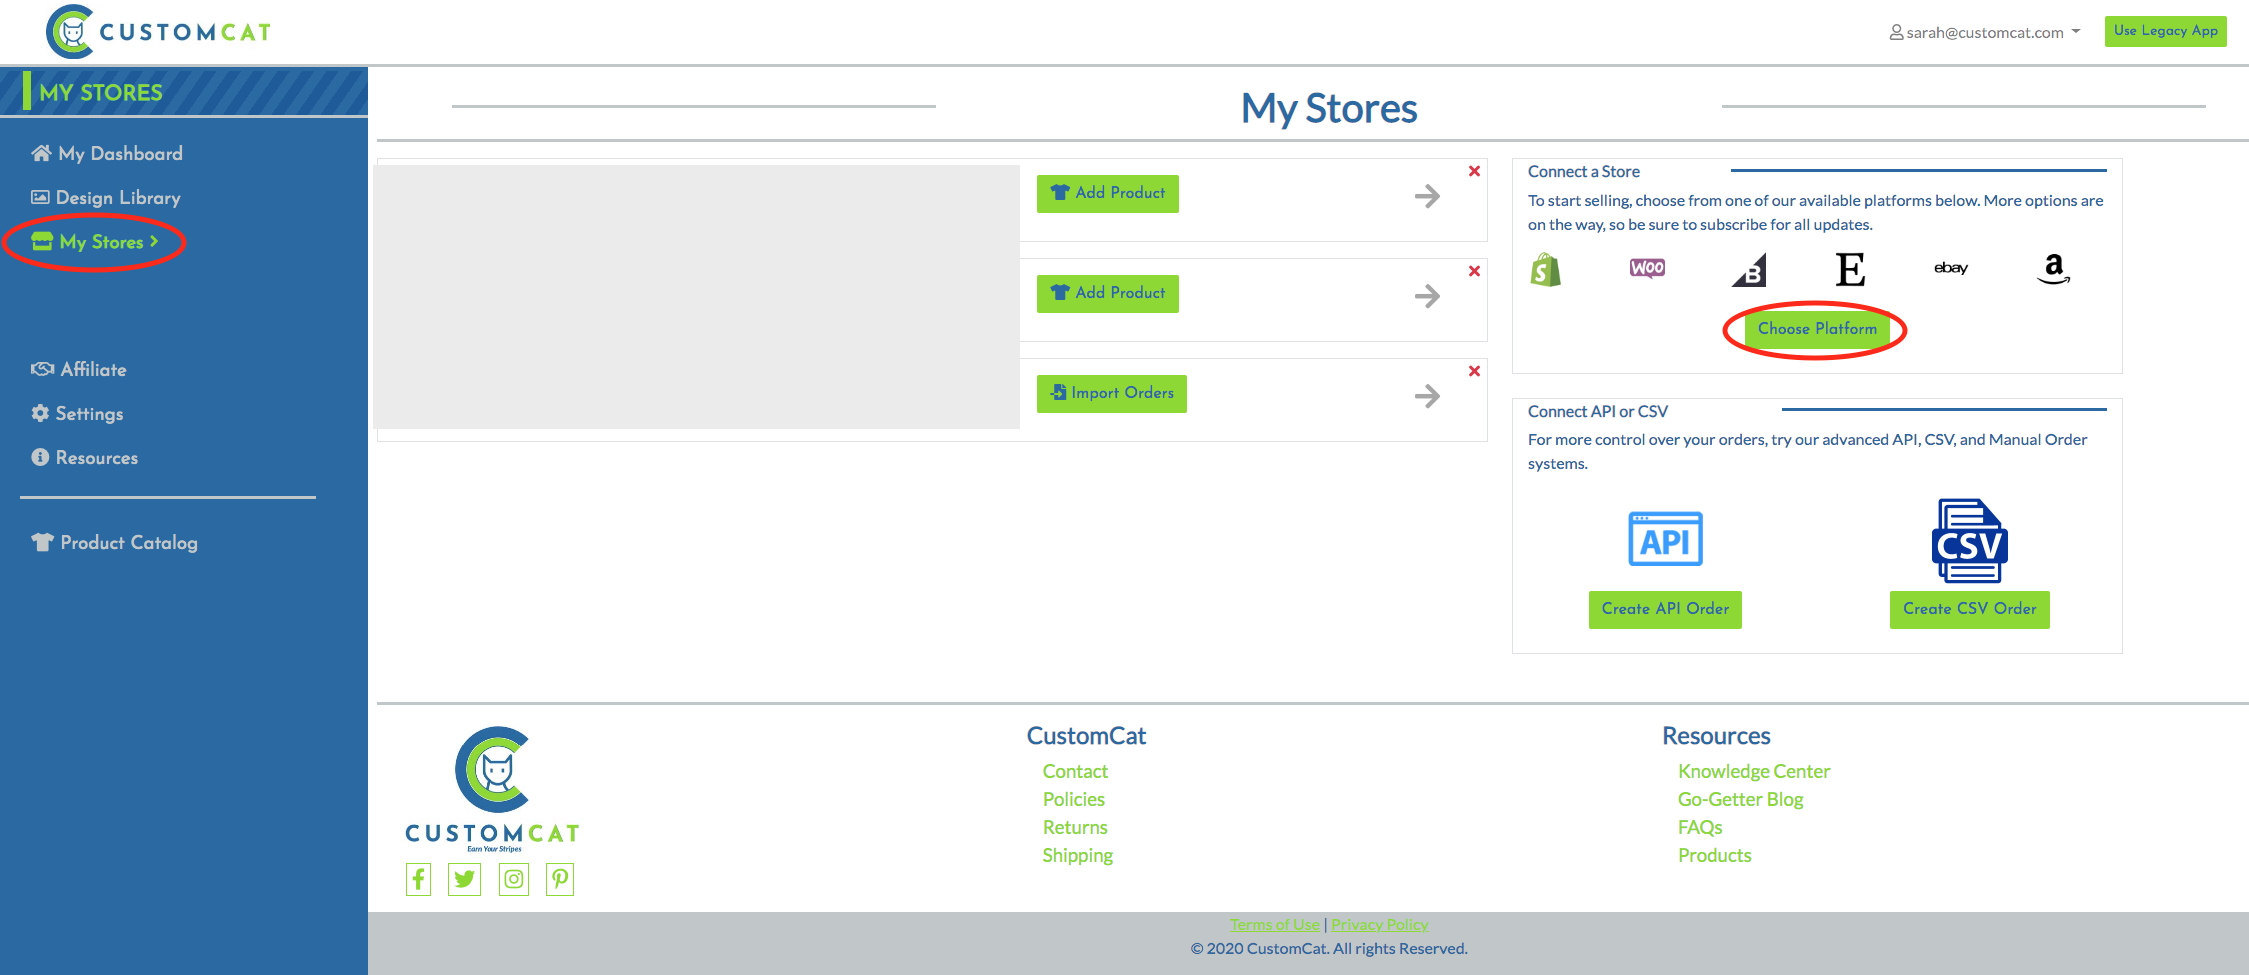
Step 3: Follow the prompts to connect your Etsy account
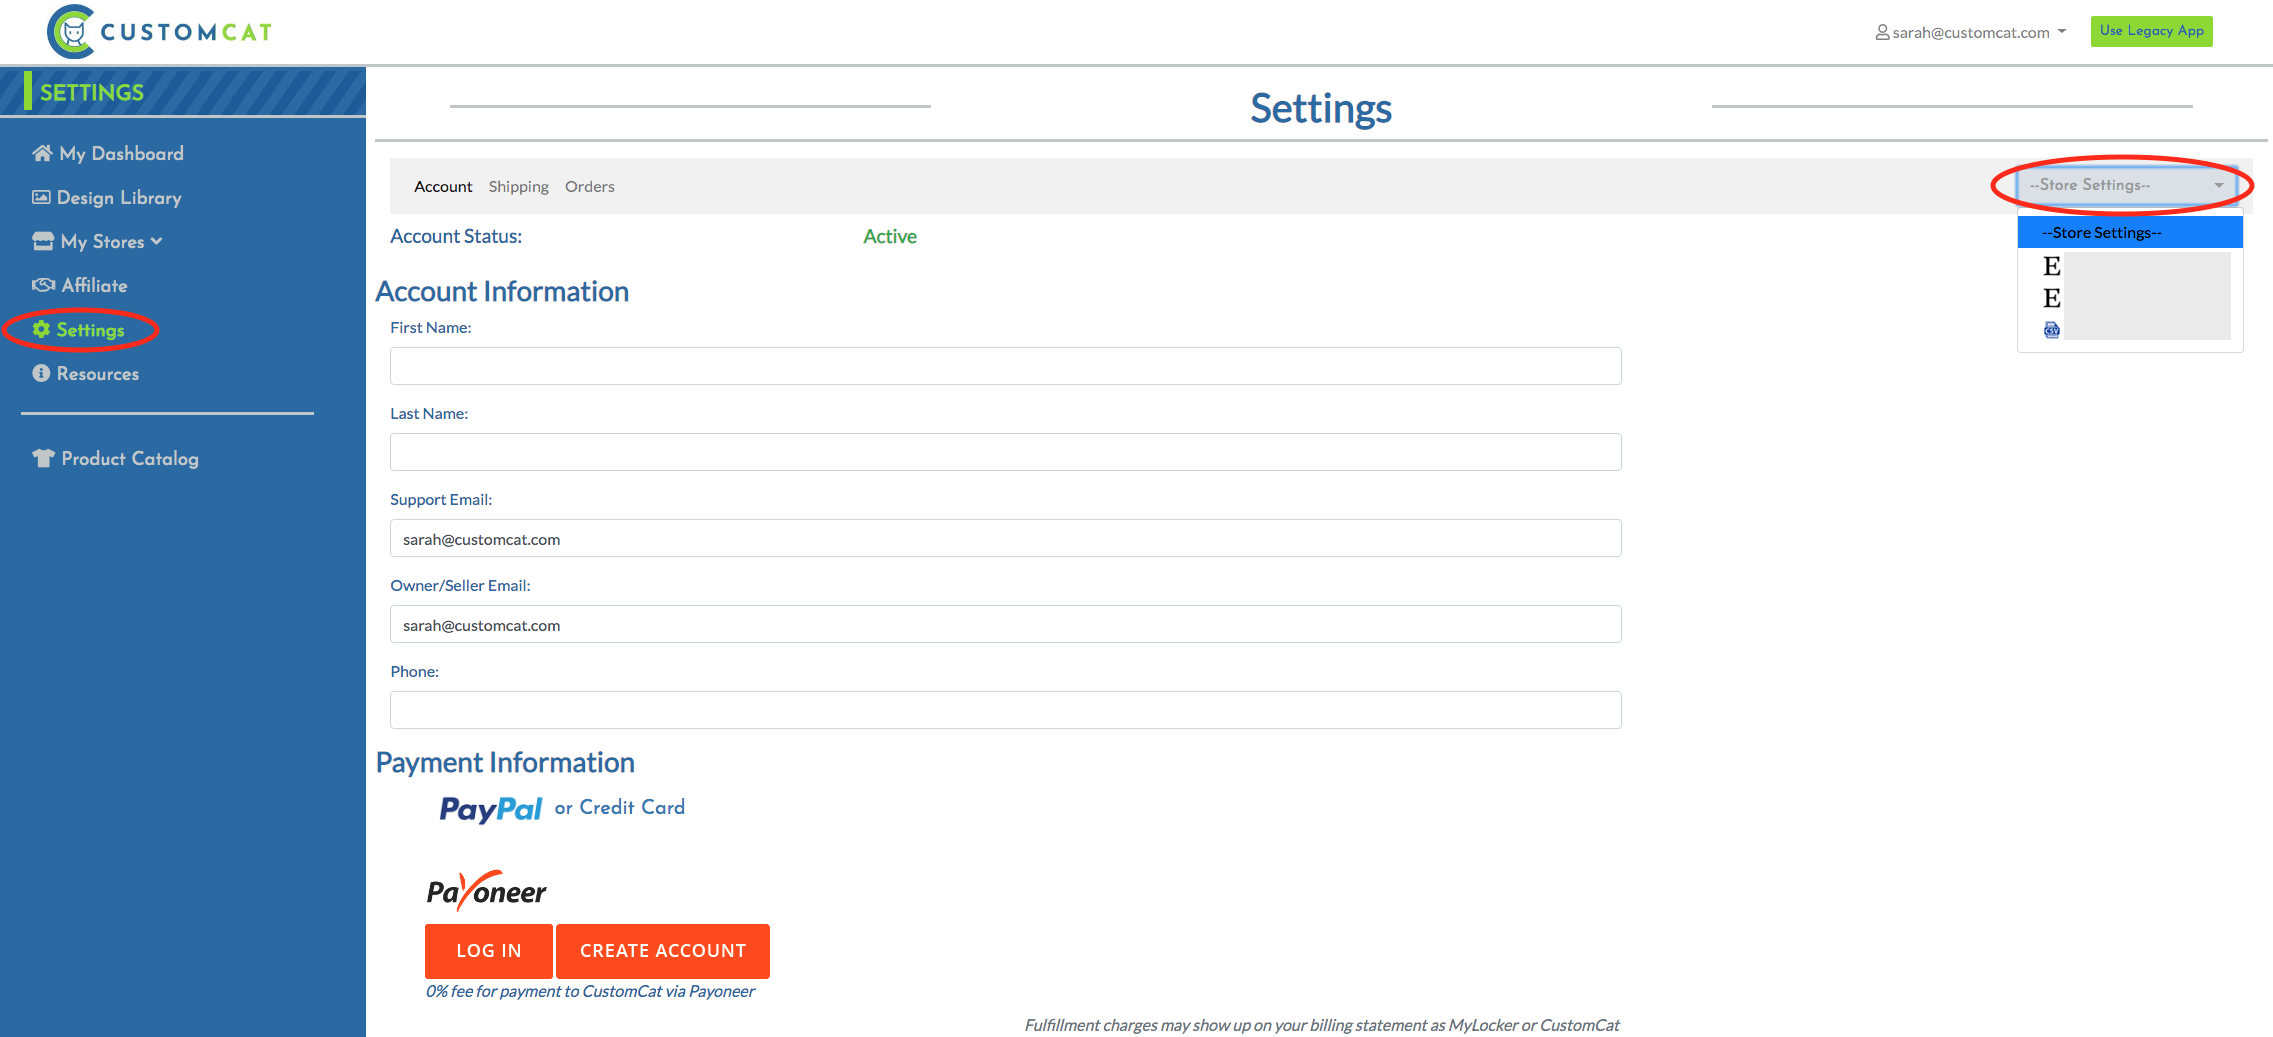
Step 4: Add your account info to your store settings & start creating products (exactly the same way you loved with our other apps)
As your customers complete orders in your shop for your newly uploaded products, the order information is sent directly to CustomCat for production. Our inventory, employees, printers, and sublimation ovens bring your designs to life before they’re shipped directly to your customers in white label packaging. All you need to do is sit back and enjoy the feeling of having created your own business.
Next, let’s walk through how to create products, push them to your Etsy shop from the CustomCat app, and publish a product listing on Etsy.
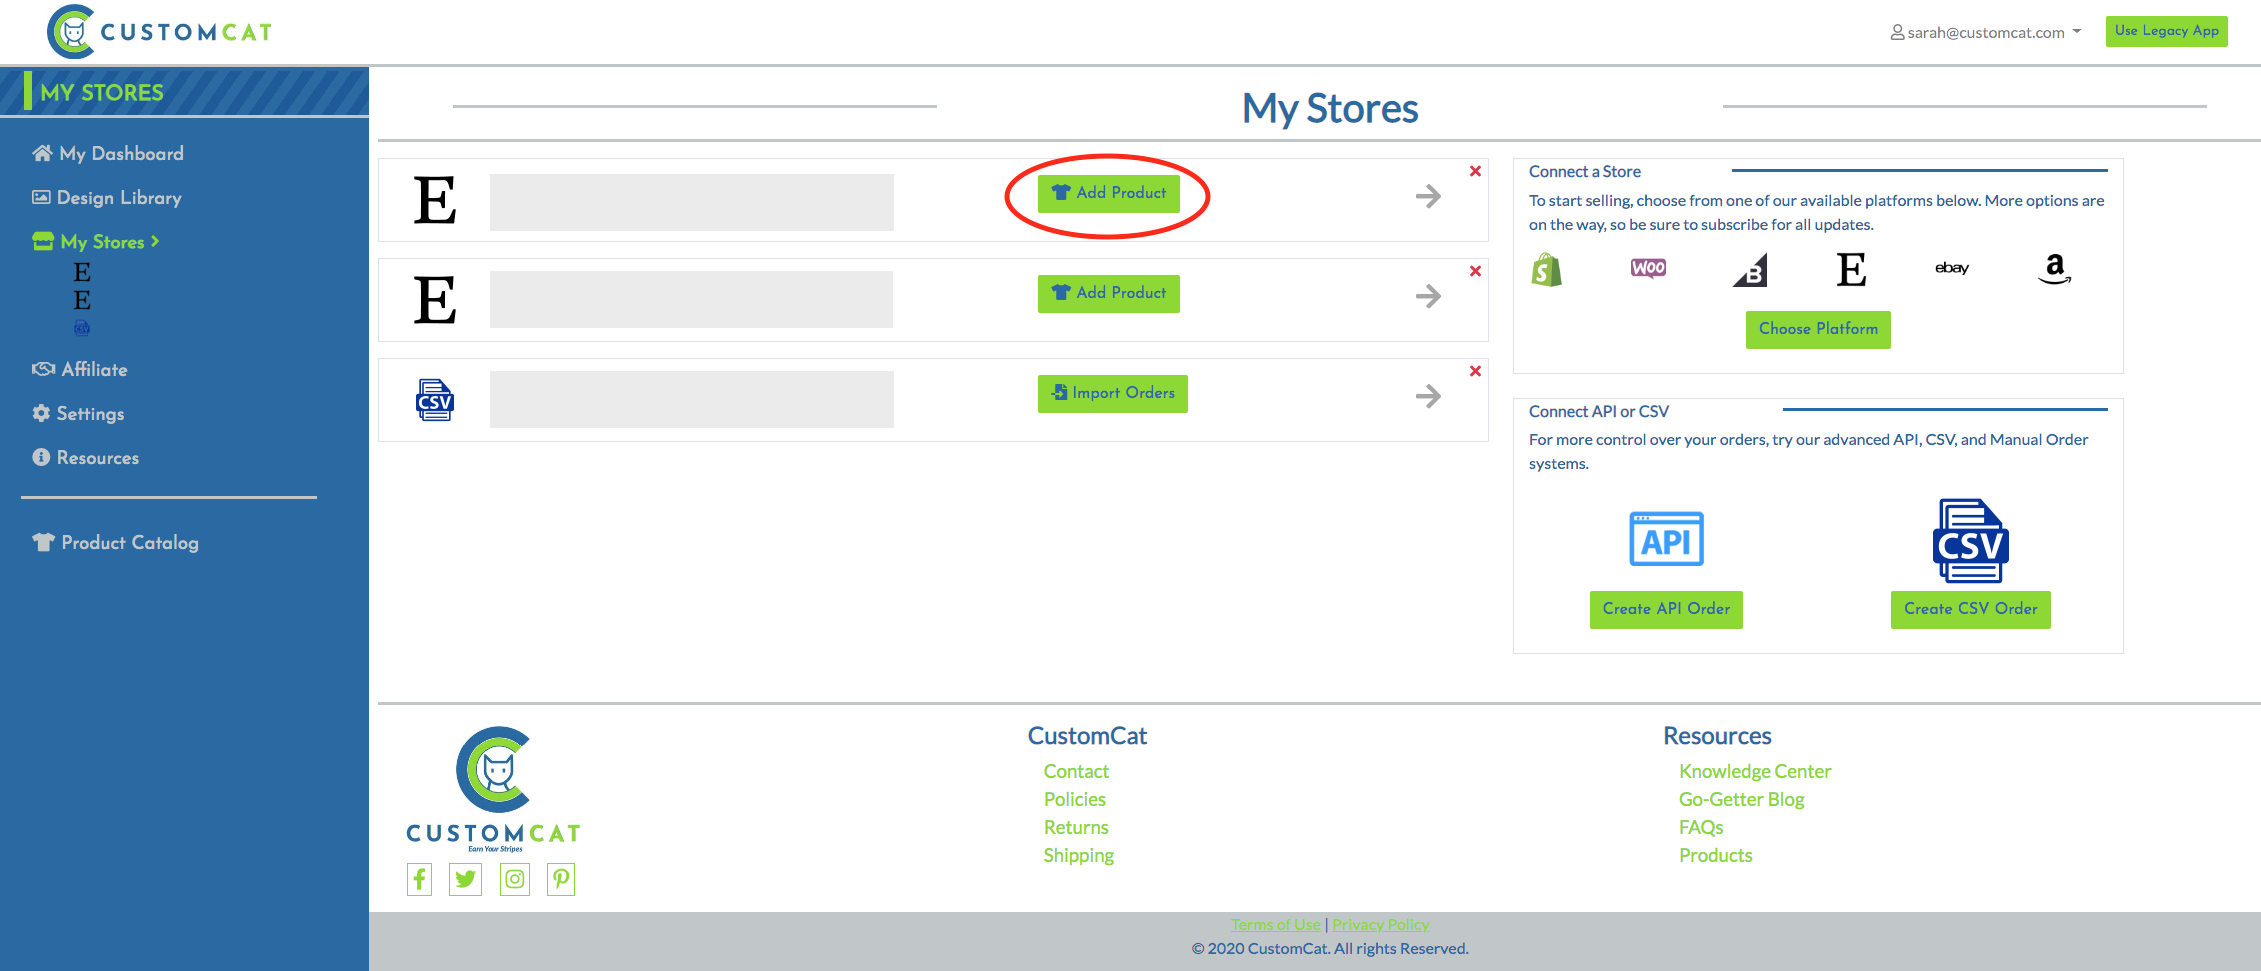
Step 1: Creating a Product
Click on “Add a Product” within your Store Dashboard.
Next, you’ll search CustomCat’s product catalog for the items to which you’d like to have your designs applied. In this example, we’ve selected an 11oz Accent Mug
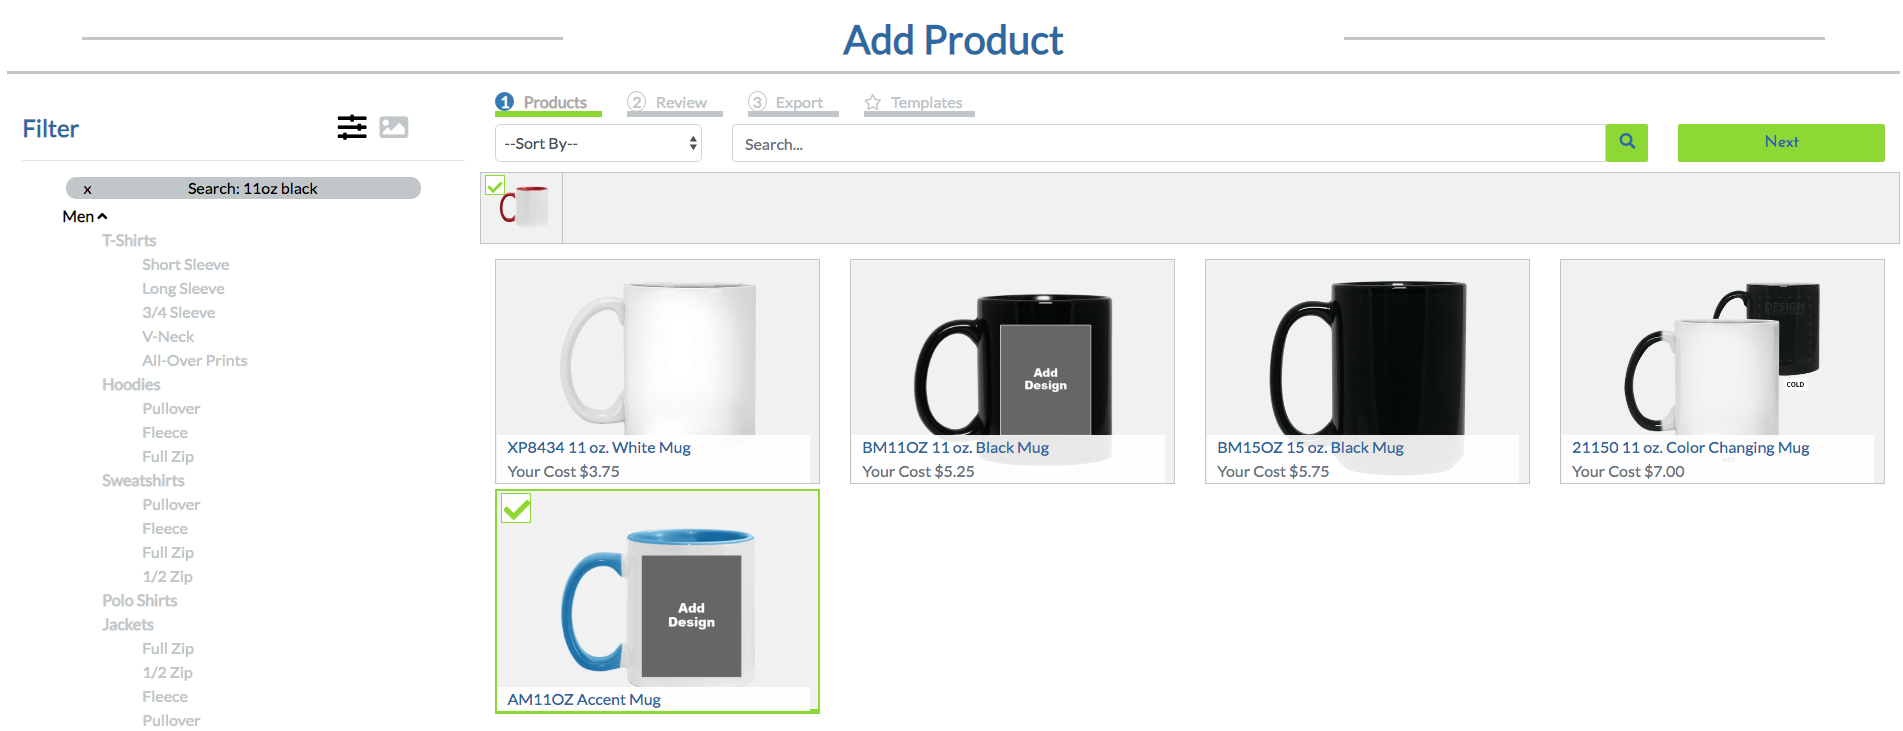
After selecting your products, you’ll be able to customize the sizes & colors you offer in your Etsy shop. This is also where you will set the price of your products, name the listing, customize the product description, and add tags. Please ensure that tags contain 20 characters or fewer. The CustomCat will count variants for you as you make your size and color selections.
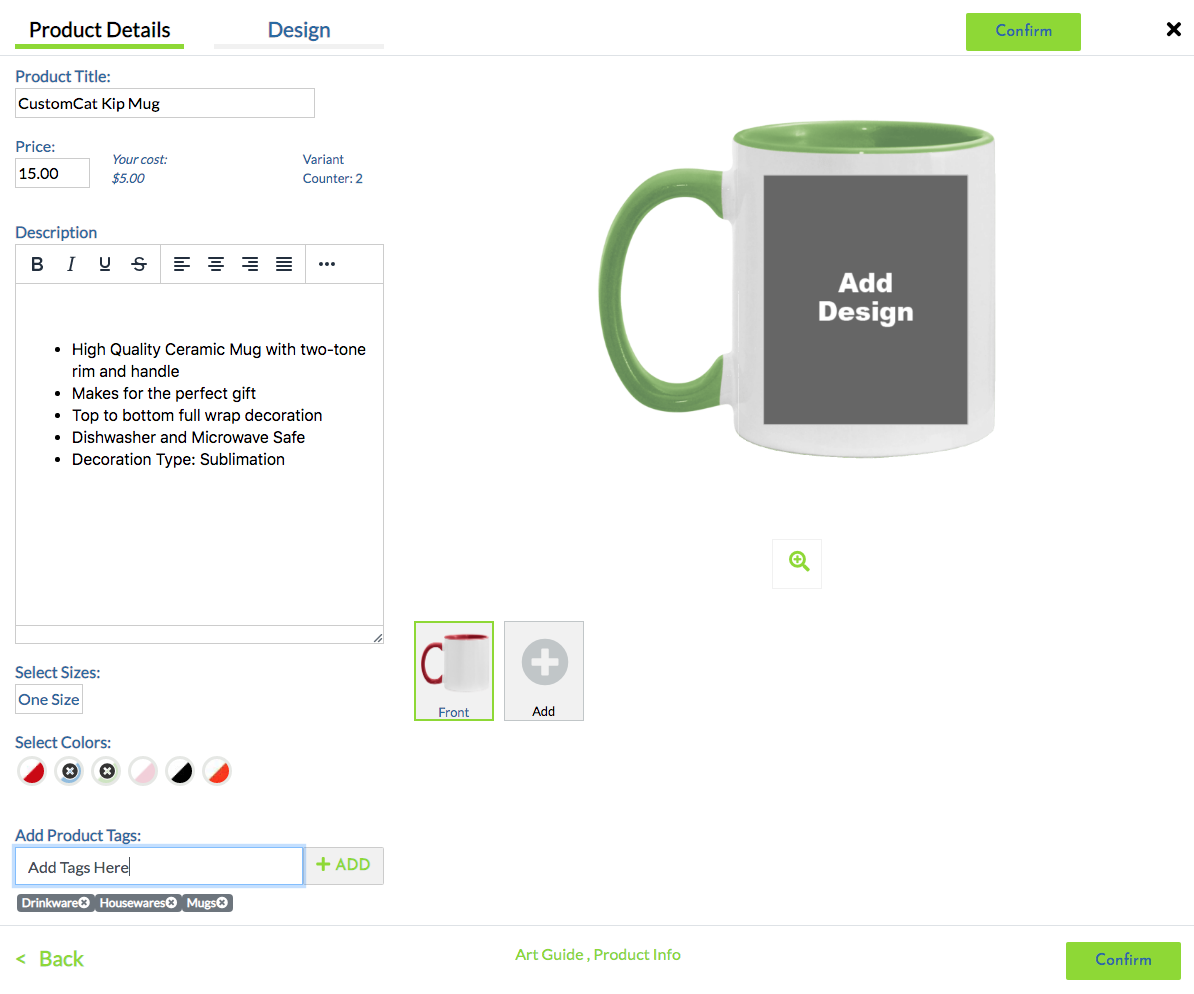
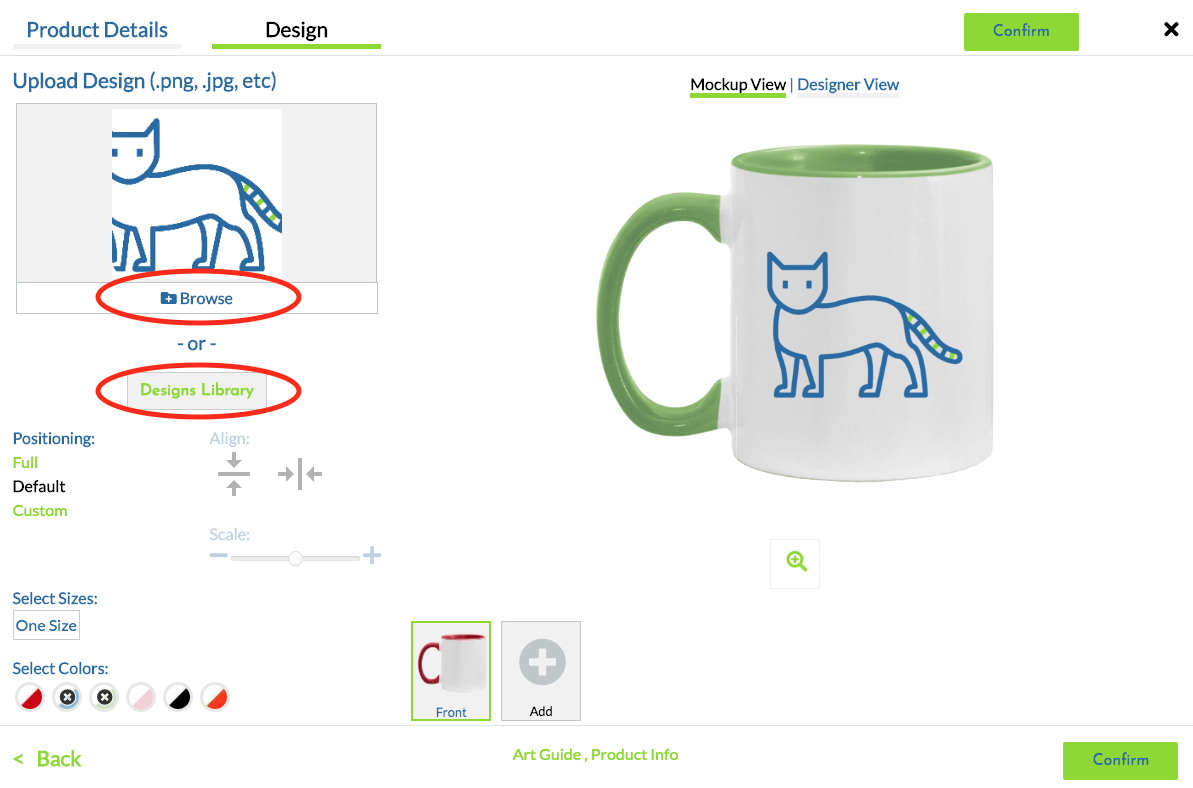
The last things you’ll do in the CustomCat app before exporting your product to Etsy are to select your artwork & preview your mockup. You can either upload a design directly to this Add Product flow or select one you’ve previously uploaded to your design library. For the purposes of this tutorial, we’ve uploaded a transparent PNG file & selected “Default” positioning so our design is printed on both sides of our mug.
Step 2: Exporting your products to your Etsy Store
After you’ve finalized the position of your design on your product mock-up, click the “Confirm” button, continue to the next screen, and click “Export”…

Voila!
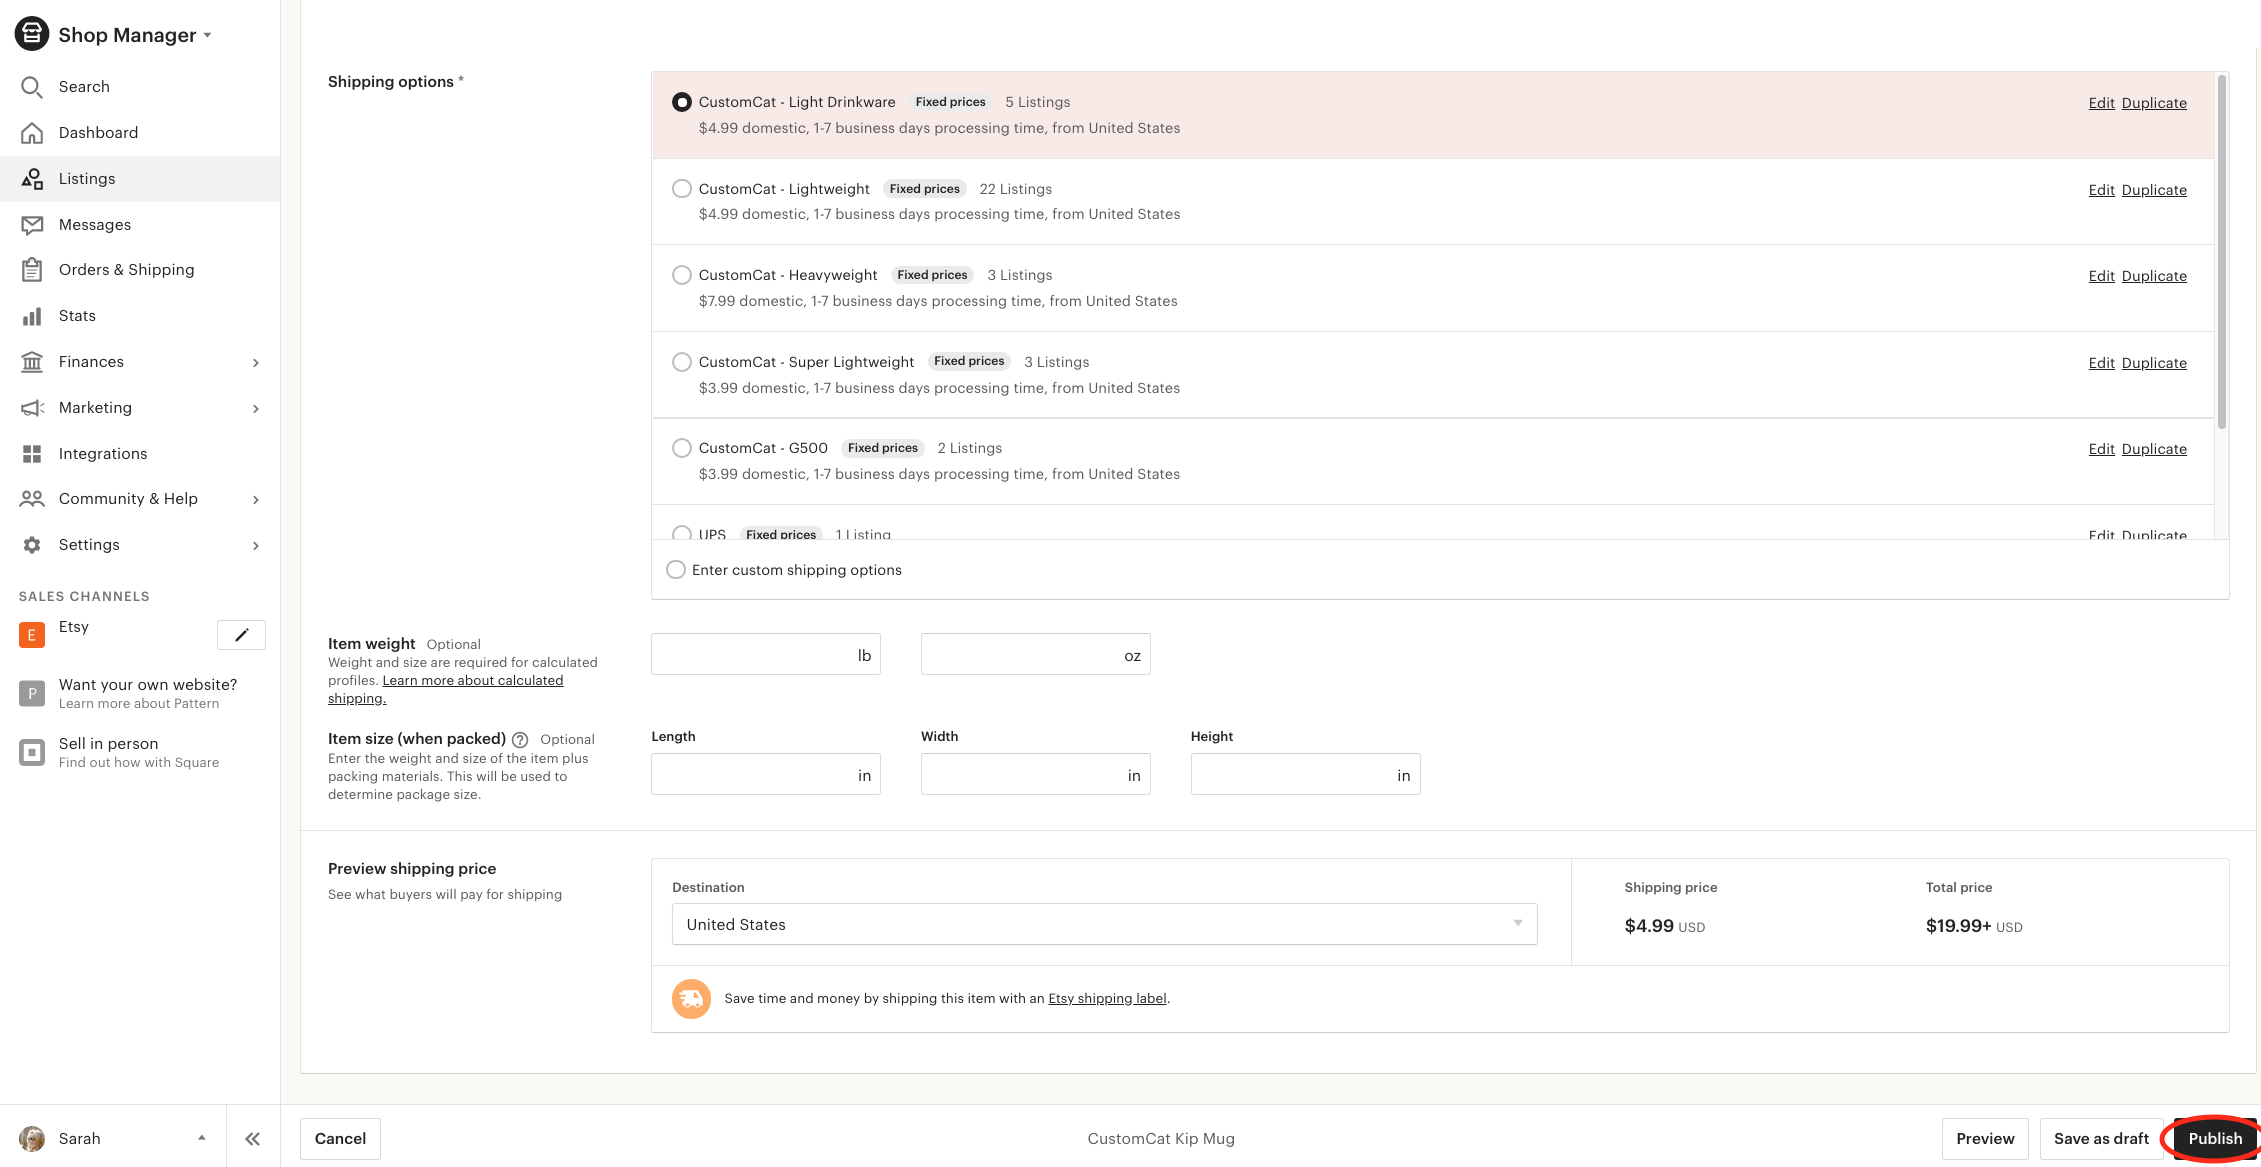
Step 3: Publishing your Etsy Listings
When your products are exported to Etsy, they are automatically filtered into your Draft Listings category for your review. Enter your Etsy Shop Manager & select “Listings” from the menu on the left side of your screen. From there, head to the right side of the screen to click “Draft.” This is where you’ll see all your CustomCat app creations!
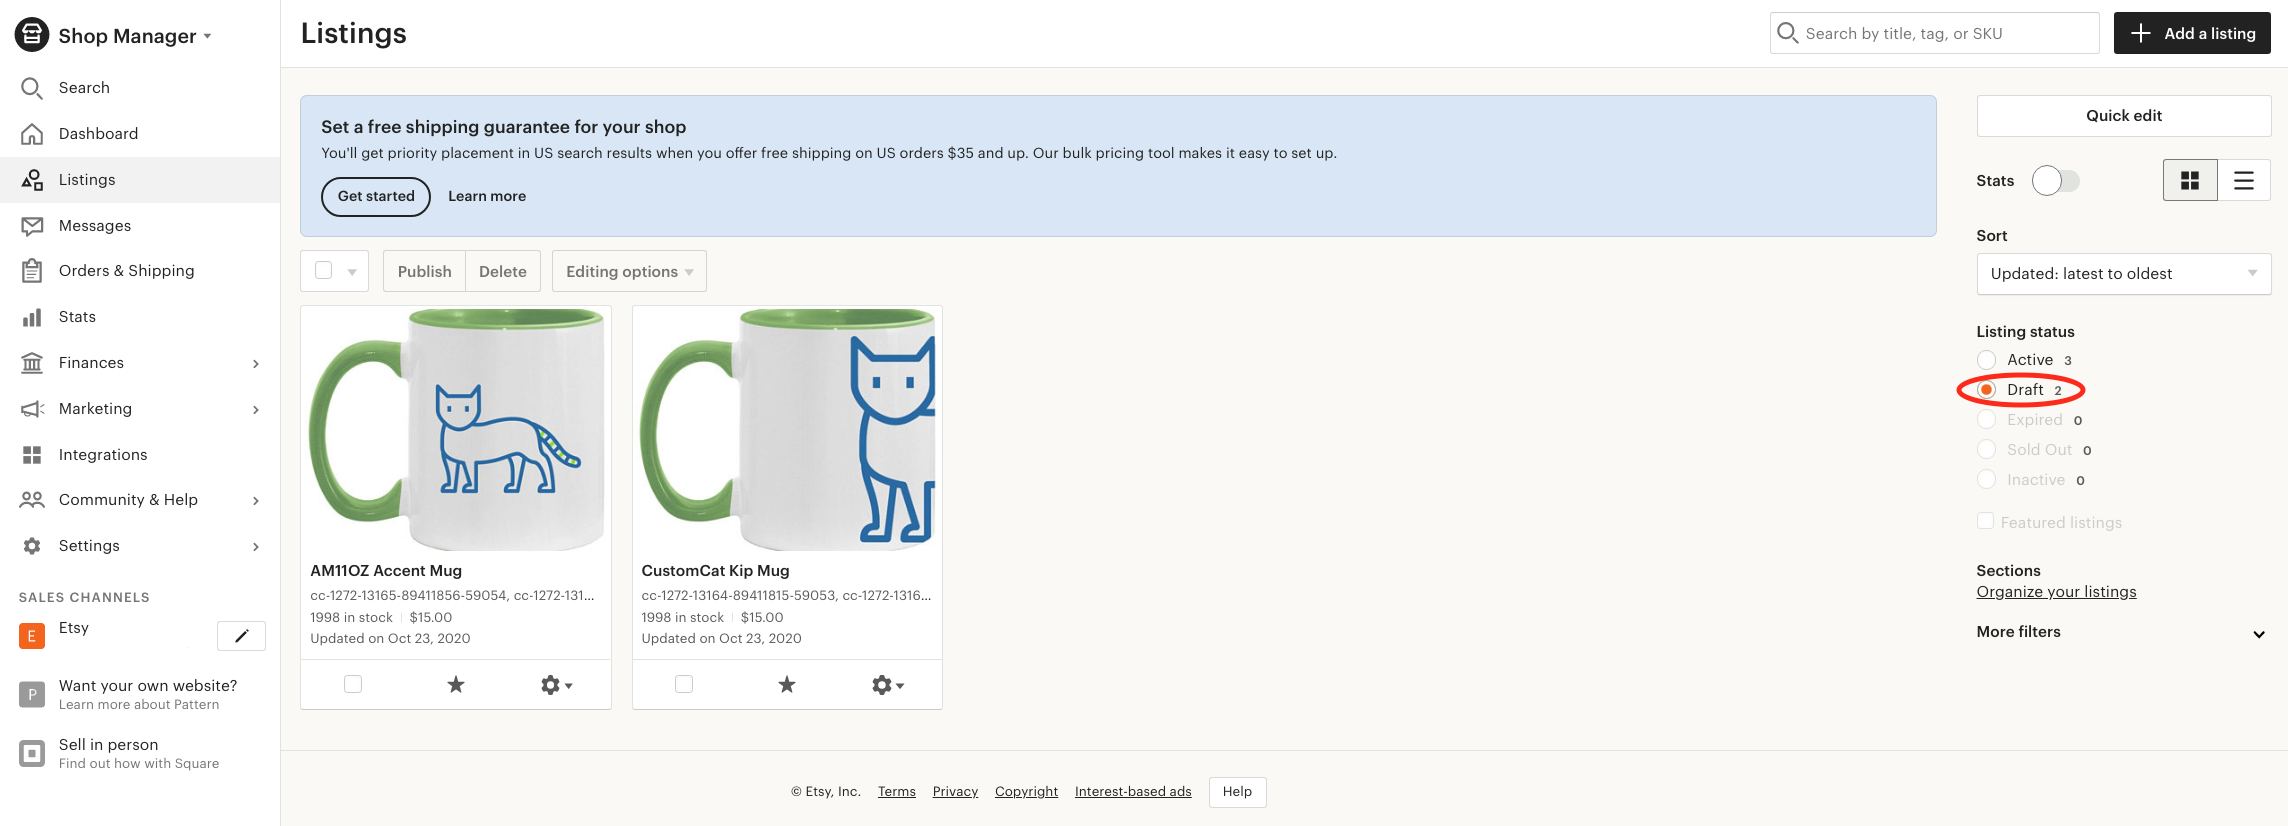
When you open each draft listing, you will have the opportunity to assign mock-up photos to each color variant, add video to your listing, and finalize product listing details before publishing.
Please note that CustomCat creates a custom shipping profile for each listing you export from our app. This is to ensure you are passing along the appropriate shipping fees to your customers. If you’d like to select an alternative shipping profile for your listing, you will make that change here.
Last but definitely not least, click the important-looking button in the bottom right corner to publish your listing.
CustomCat will take it from there. As orders are placed within your Etsy shop for your new customized products, they will be sent to CustomCat’s system for production. We will bring your design to life & ship it directly to your customer in white-label packaging. Before you know it, your customer will have your design in their hands, eagerly awaiting the opportunity to leave you a 5-star review!
For a Step-by-Step tutorial on creating Personalized designs with CustomCat + Etsy, check out our Etsy Personalization Guide.
Featured Resource
2 thoughts on “[Tutorial] CustomCat’s Etsy Integration”