
Adding Products to Your Store

This is a step by step guide on how to upload products to your website from the CustomCat app.
Let’s get started!
Adding Products
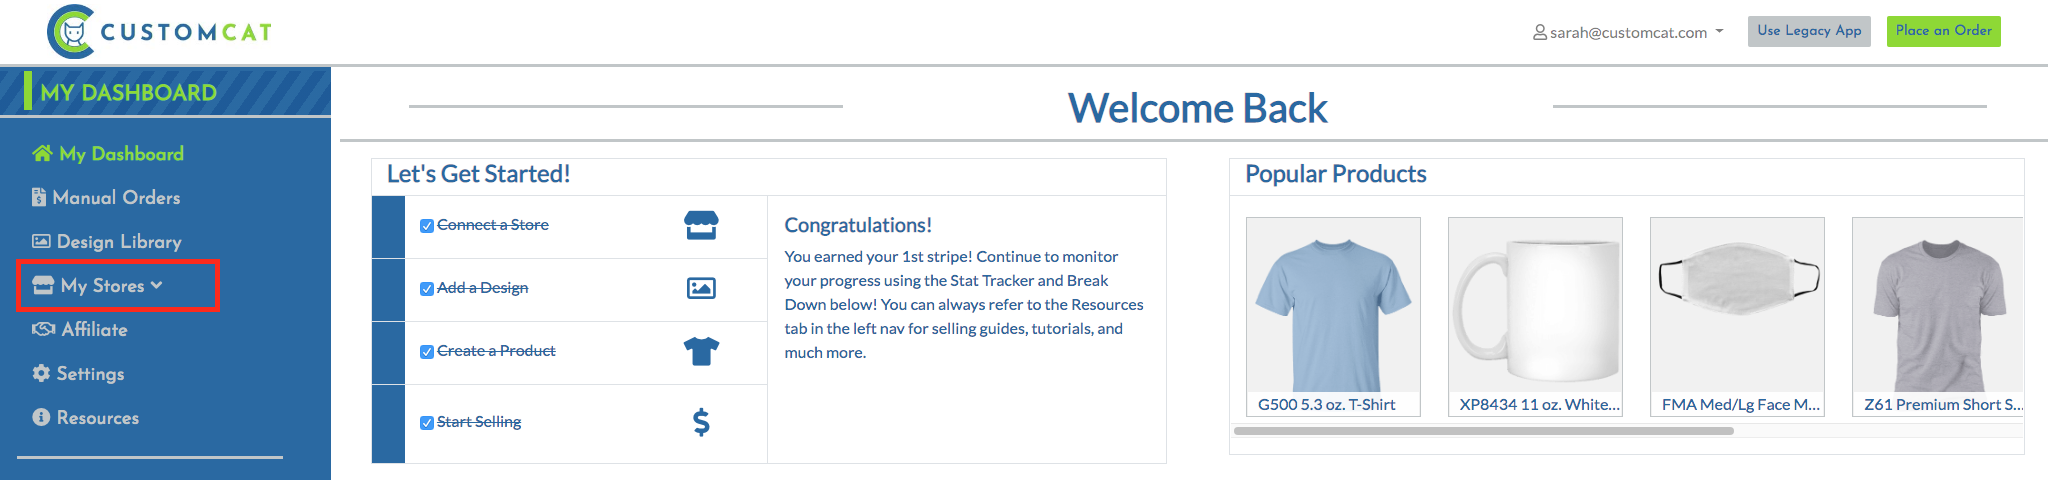
After signing into your CustomCat account & connecting your store, you’ll click “My Stores” from the left navigation menu.
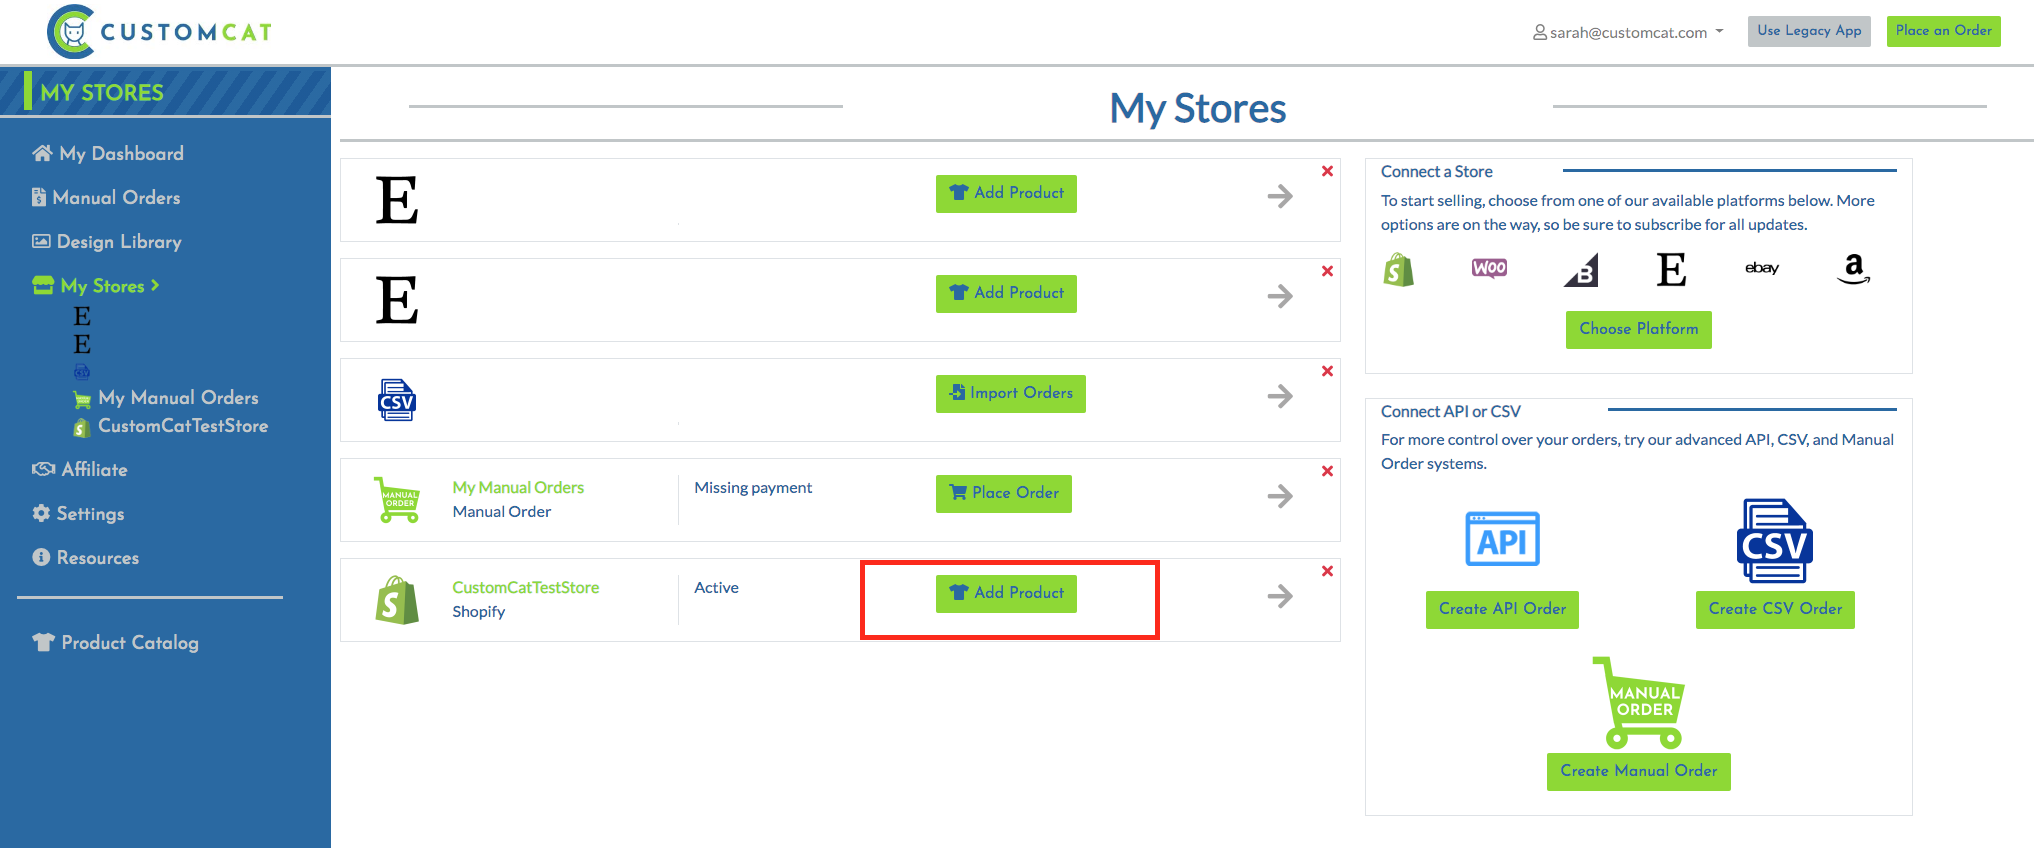
Next, select the “Add Product” button next to the store to which you’d like to add products.
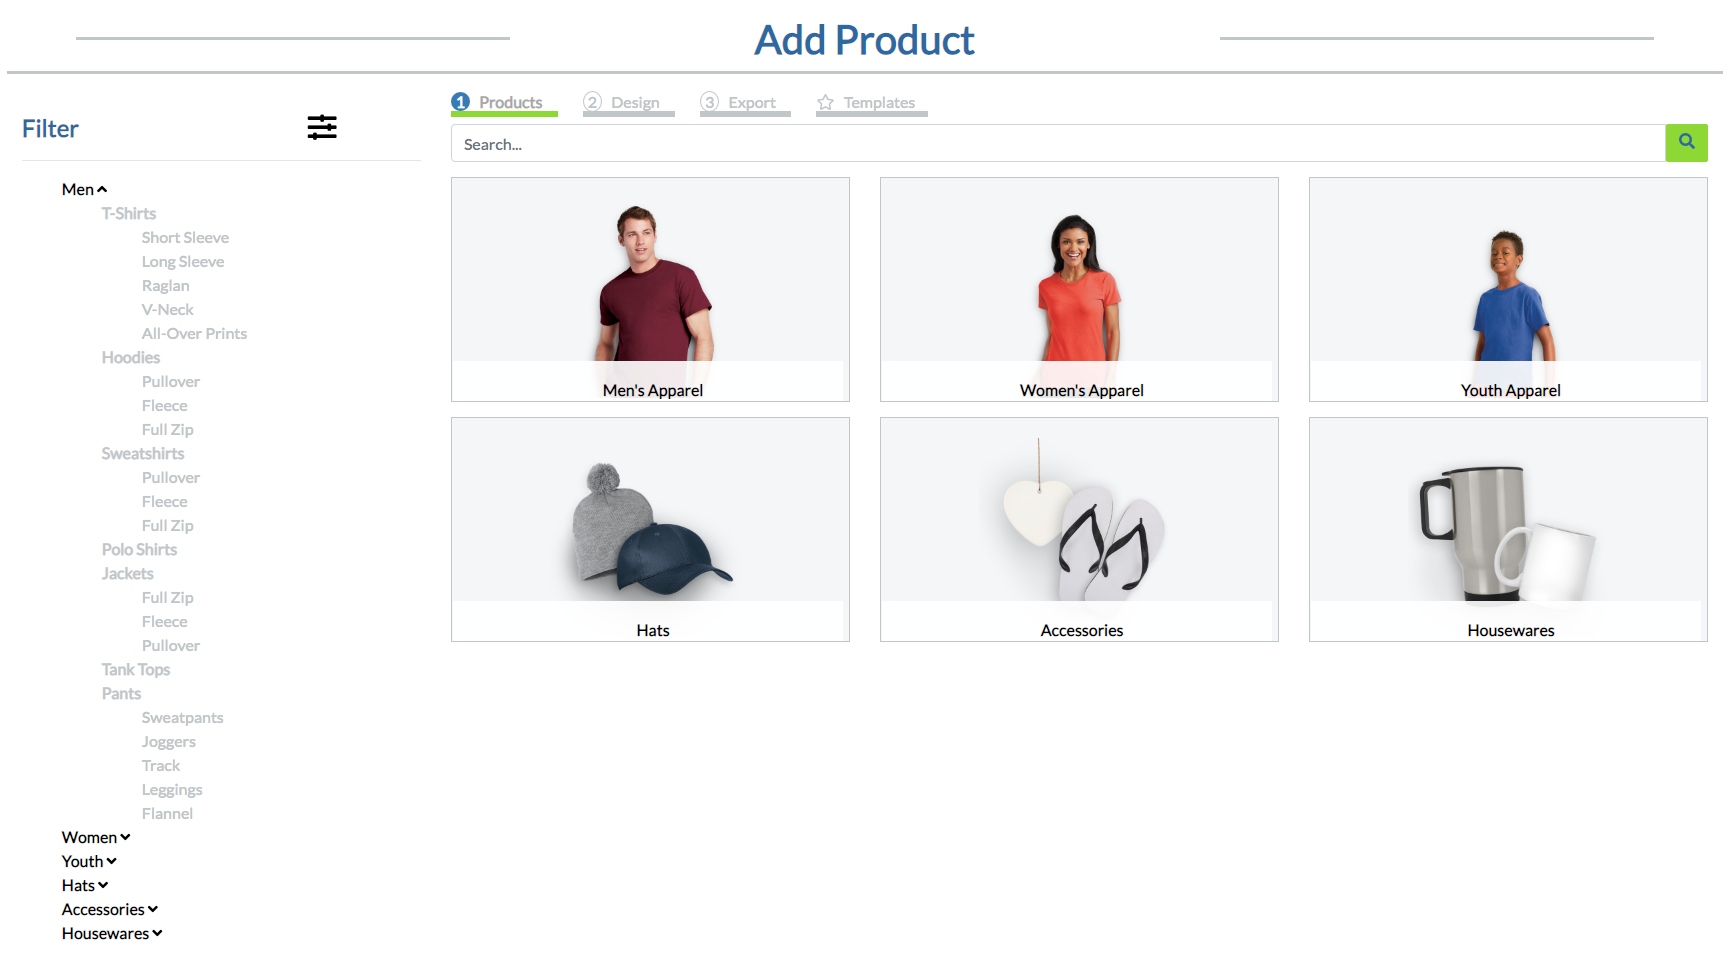
You’ll be brought to the CustomCat catalog, where you can select any of our more than 350 products for customization.
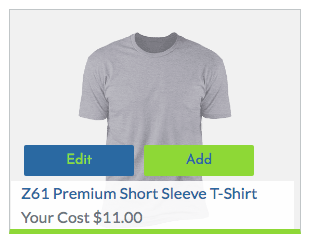
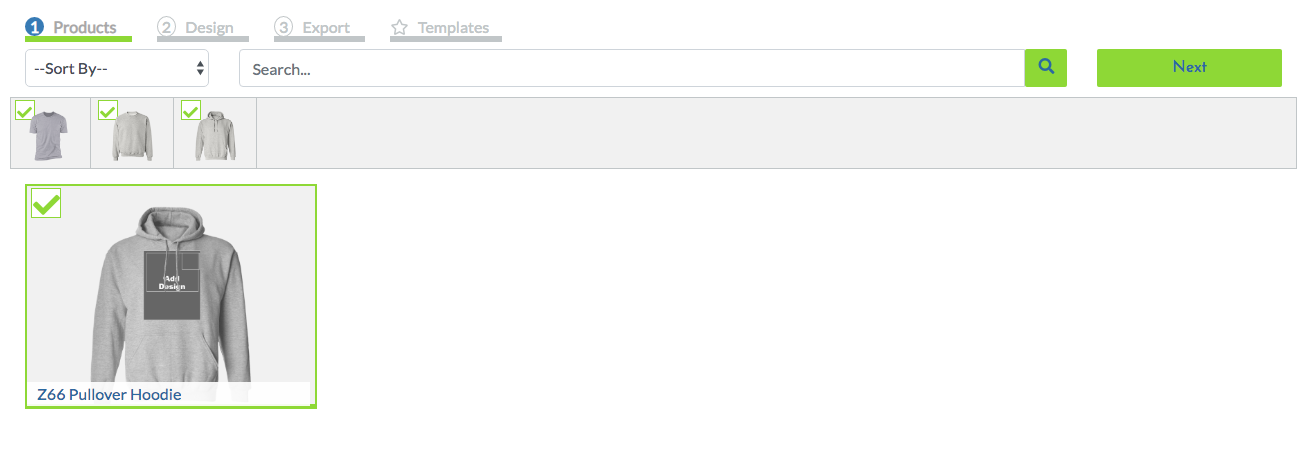
When you hover over the product you’d like to select, you can click “Add” & move to the next step.
We also provide the option to Edit the product details on this step. You can do this by clicking the “Edit” button, clicking the product twice, or simply wait until Step 2 (recommended).
For the purposes of this tutorial, we’ve selected “Add” for the Z61 Premium T-Shirt, the Z65 Crewneck Pullover Sweatshirt, & the Z66 Pullover Hoodie. We know they’re selected because they display in the grey selection preview bar. From there, we click “Next” the progress to Step 2. Design.
Step 2. is where you’ll select your designs for each product. We provide a few options for how to do this most efficiently.
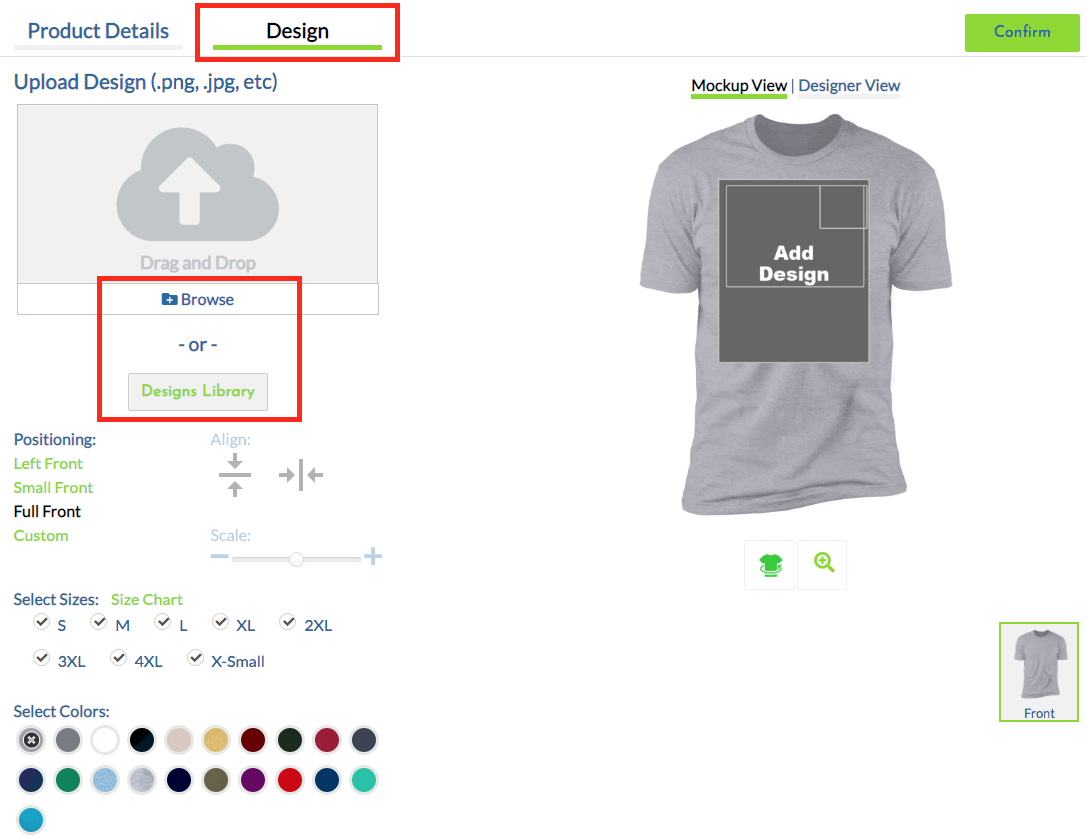
Option 1. — Click the “Add Design” image on the product to populate the Product Details. From there, Click “Design” as shown below to upload or select a design from your Design Library. From here, you can also update size & color selections.
Option 2. — Select or upload a design to be added to all your selected products. If you choose multiple designs, the products you selected will be duplicated.
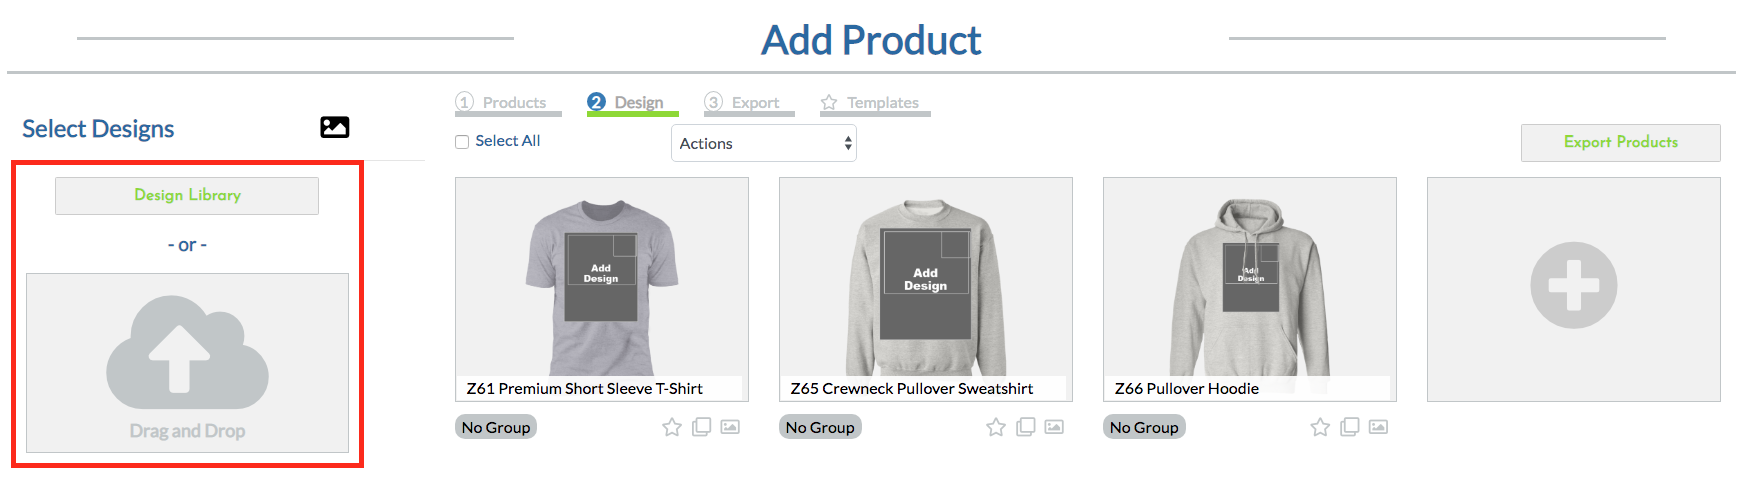
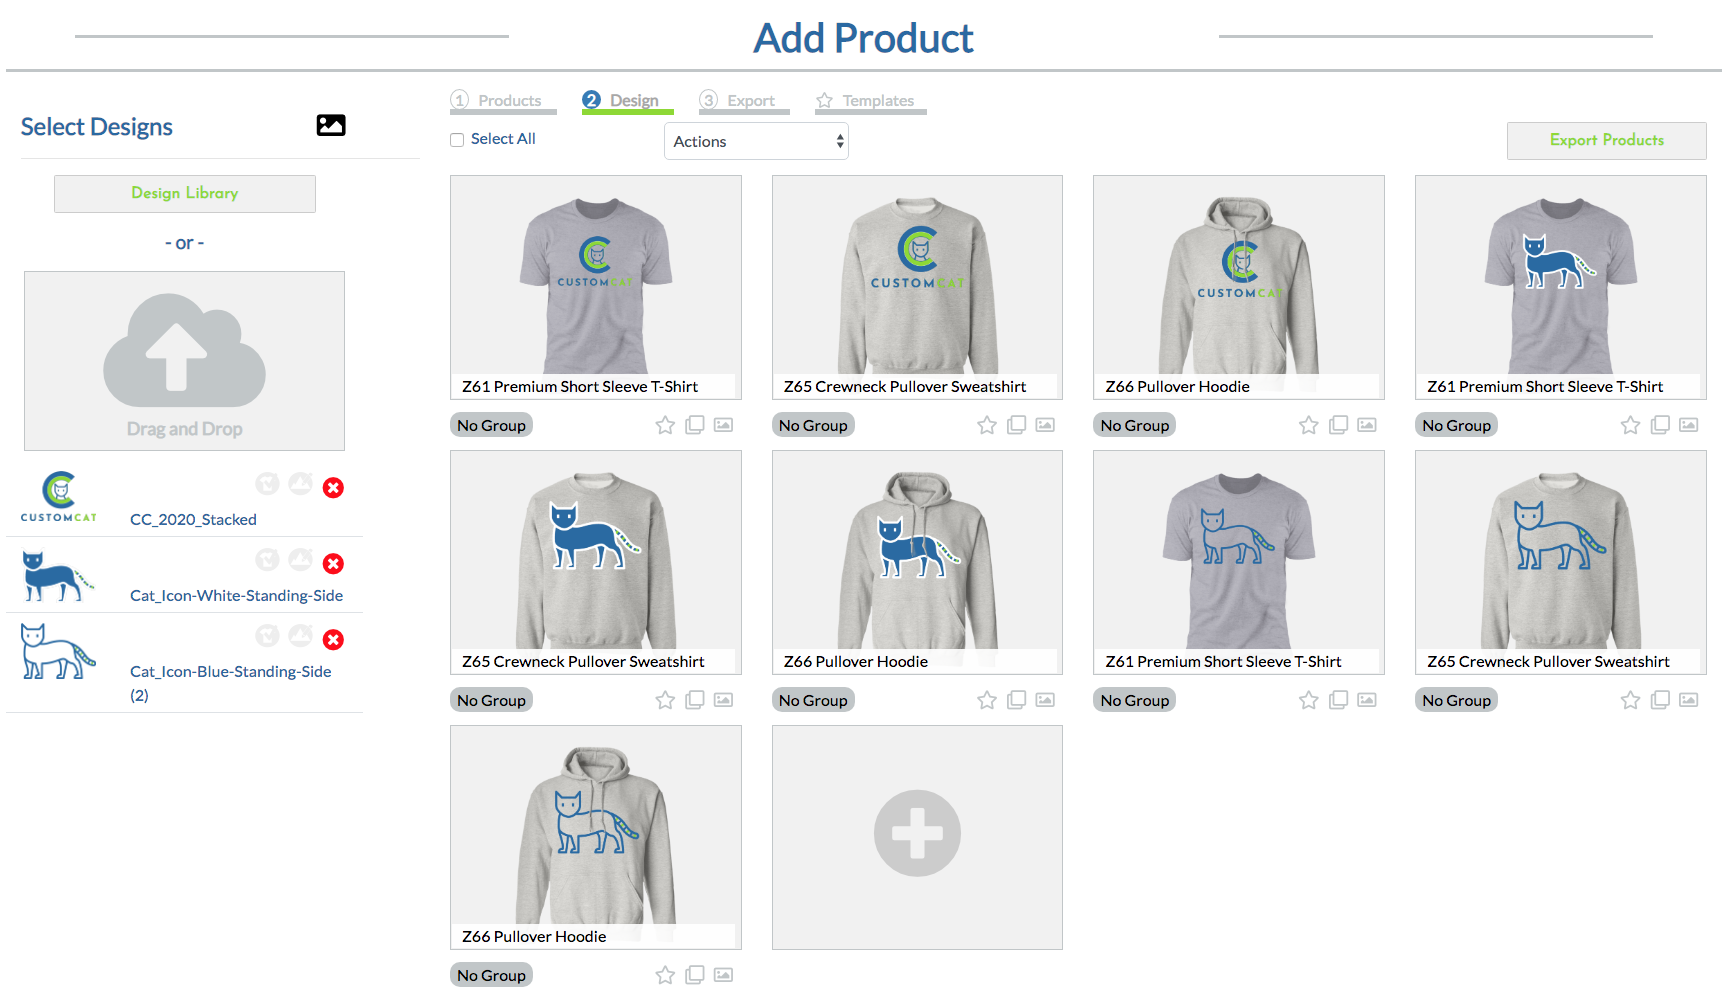
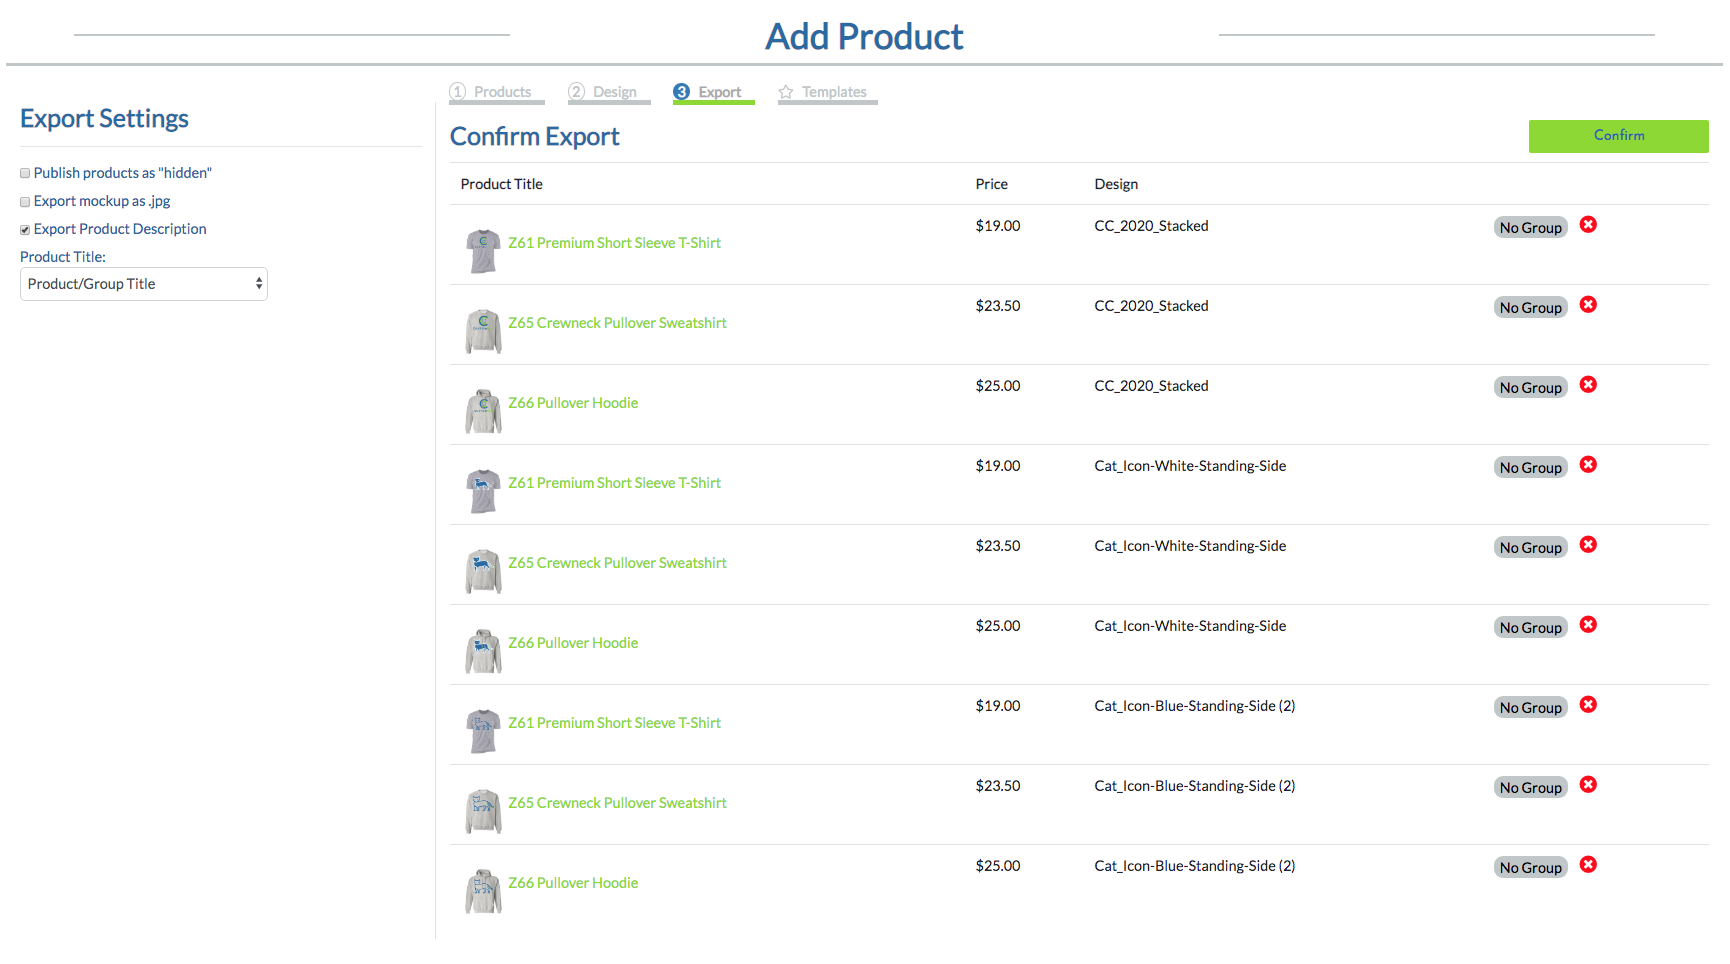
In the example below, we’ve selected 3 designs to be applied to our 3 garments to generate a total of 9 listings.
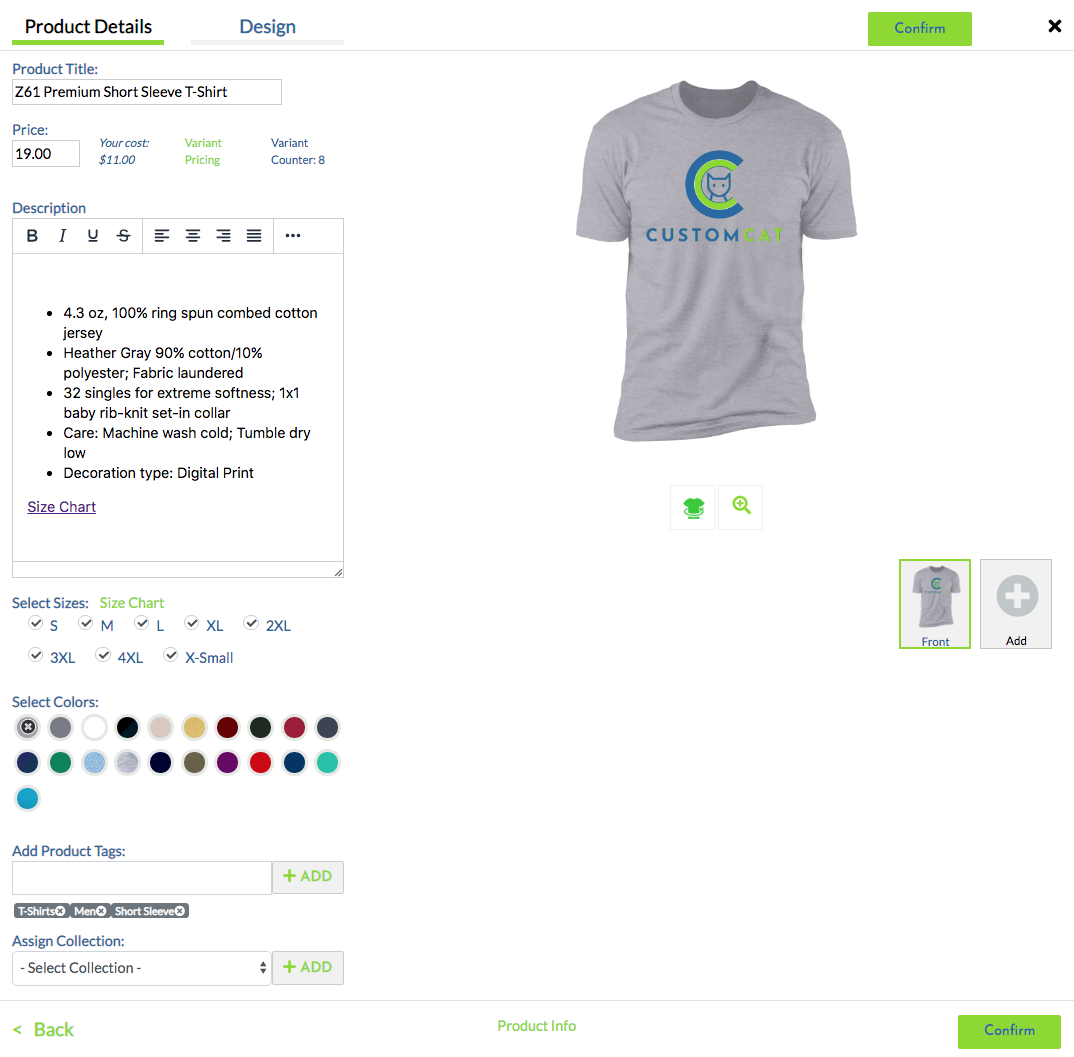
If you’d like to update the product details, click the product you’d like to edit.
You will be redirected to a pop-up page where you can make the following adjustments.
- Rename your product title
- Adjust your listing prices
- Choose colors and sizes
- Edit your product description
- Add product tags
- Assign to a collection
You can create up to 100 variants for a single product. In case you are confused about what Variant is, check out Variants in the Shopify help center for more information.
Within this popup window, you can also adjust your design size & positioning by clicking “Design.”
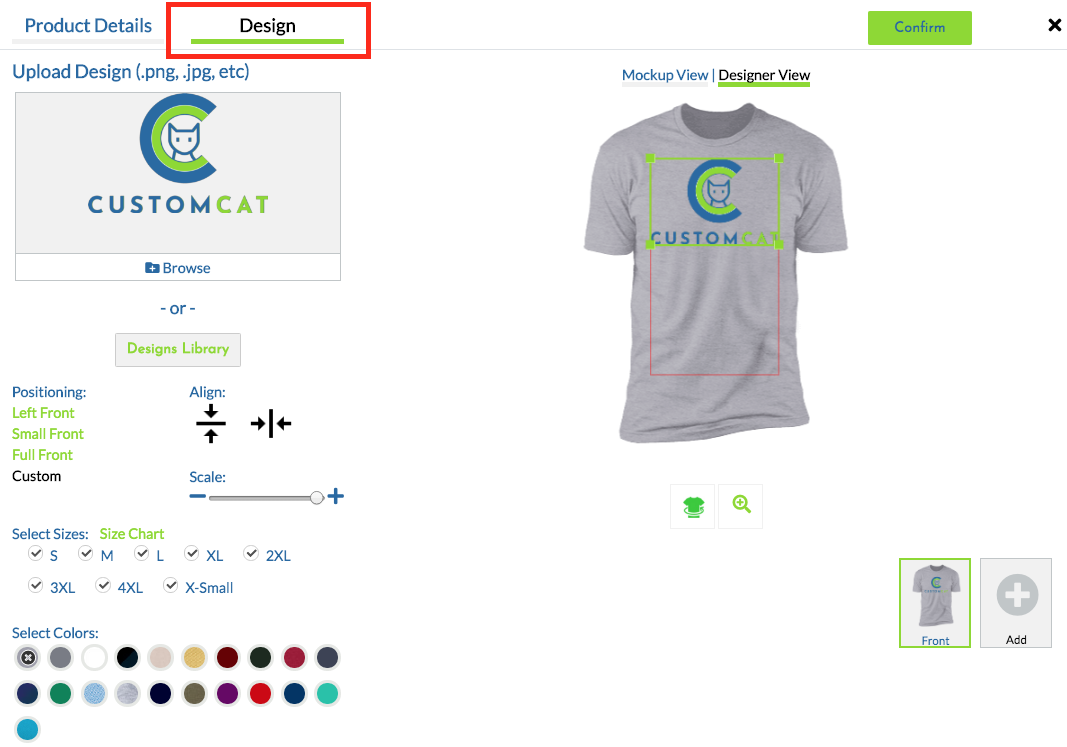
So what do each of the apparel Positioning Presets mean?
Left Front: Your image will be resized to fit over the left chest of your garment.
Small Front: Your image will be centered & top-justified to be printed 3″ below the collar of the garment at ~2/3 the maximal width.
Full Front: Your image will be centered & top-justified to be printed 3″ below the collar of the garment at the maximal print dimensions (while maintaining the original aspect ratio of the design). This is our default selection.
Custom: You are in full control of the placement of your image. You can resize, reposition, center your image vertically, or center your image horizontally using our fixed-ratio resizing tools or centering options. After adjusting your image, be sure to click “Mockup View” to get a preview of how your design will be printed based on your adjustments
Once you are all set with your edits, click on Confirm in the top right or bottom right corners of the Product Details pop-up to save your changes.
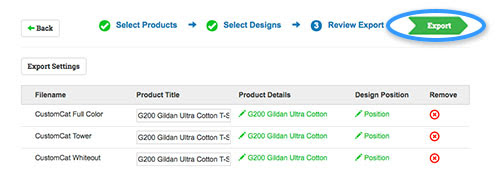
Lastly, progress to Step 3. Export & click the green “Export” button in the top right corner of your screen.
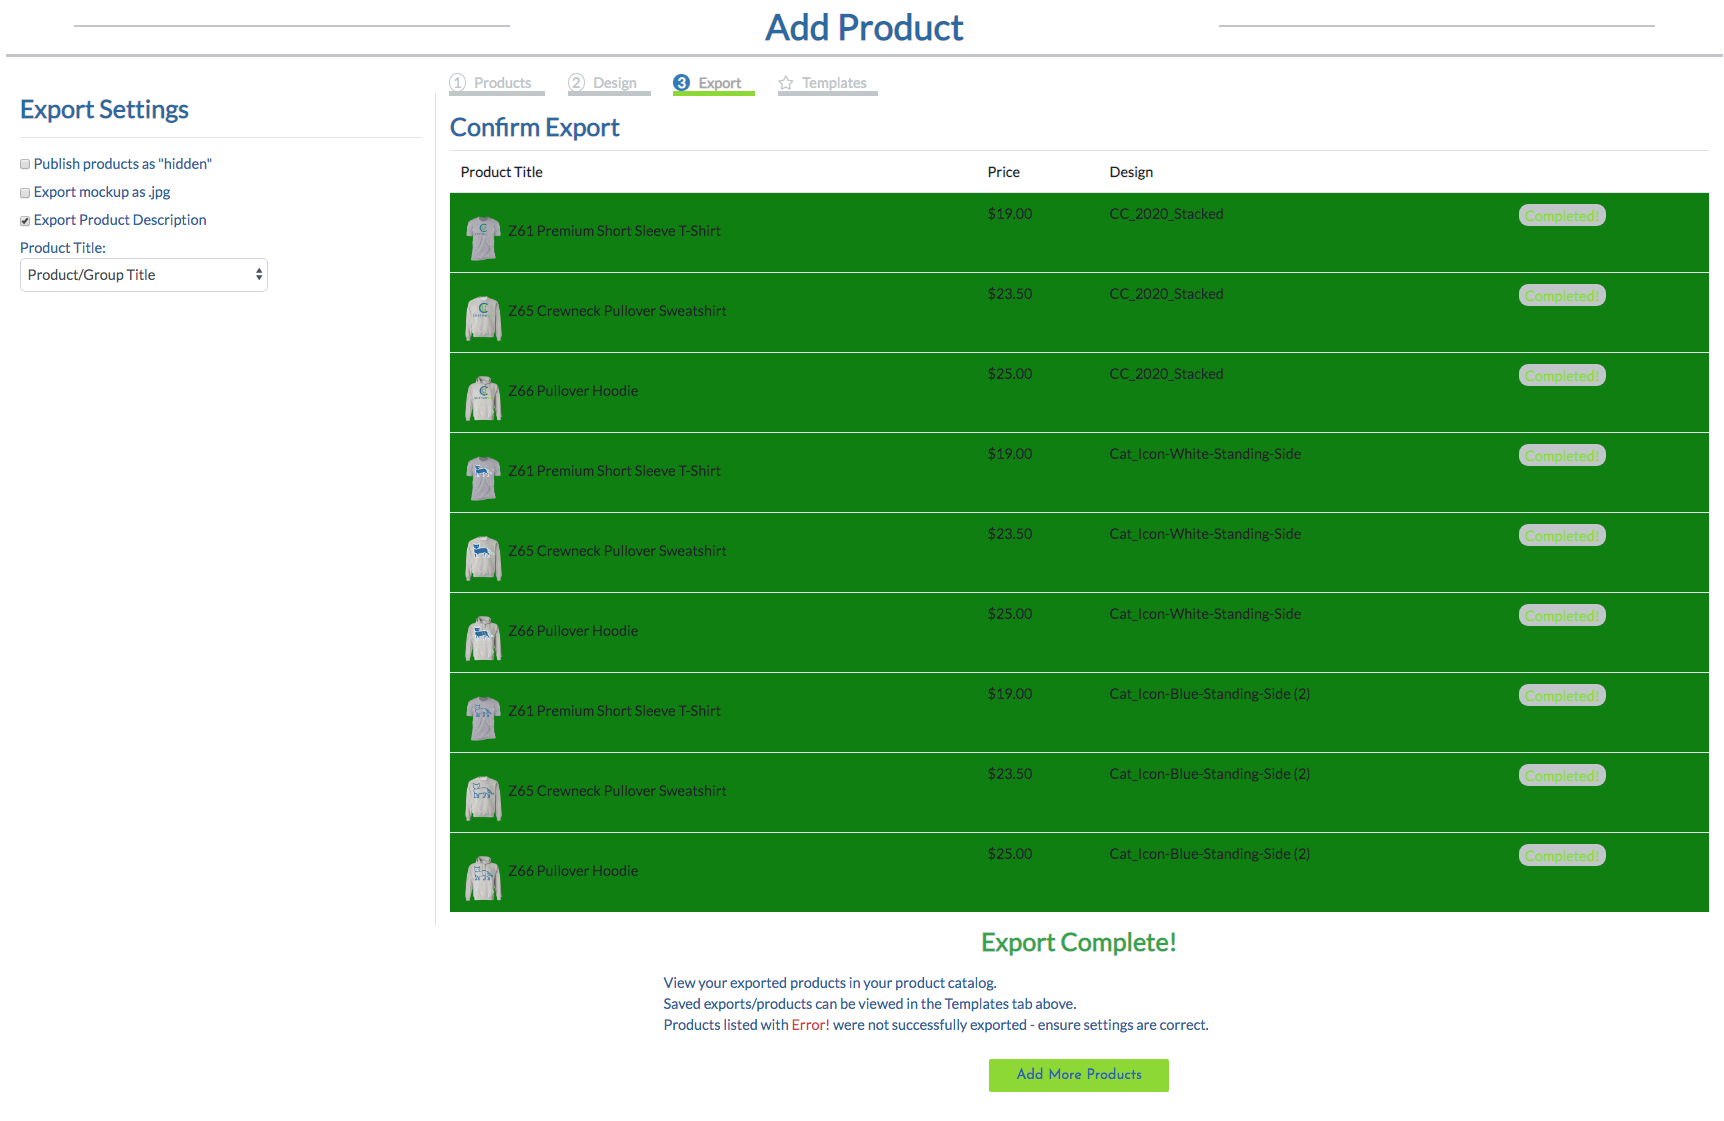
And that’s it! Your designs will begin to export to your store. As the exports are complete, you’ll notice the product turn green. Once each of the items in your export list are successfully exported, you will have a “Success” message at the bottom of your screen.


Adding Multiple Products as a Single Product Listing:
You can set up your products to export in groups easily within the CustomCat app.
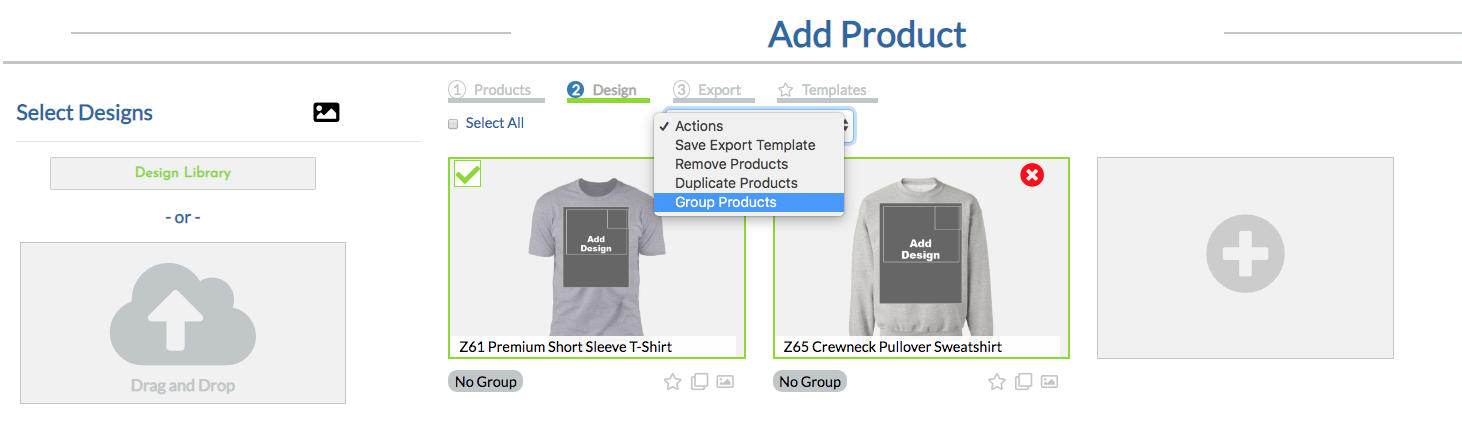
Prior to export, in Step 2 of the “Add Product” flow, select the products you’d like to group into one listing. Next, select “Group Products” from the dropdown menu above. You can complete this action before or after applying a design to your products.
Voila! You’ll notice the products you selected are now highlighted as belonging to “Group 1.”
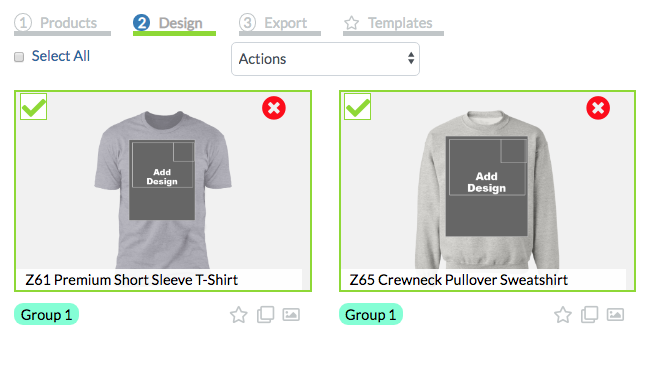
These products will now export as a grouped listing when you export them to your online store.
**Special Note Regarding Grouping & Etsy***
Etsy limits listings to two variant categories per listing. For this reason, we do not recommend grouping apparel when exporting to Etsy (as Size, Color, & garment style would all be required for clarity of your customers’ selections). Please only utilize the grouping feature on Etsy if you are grouping Dye-Sublimation products such as Mugs or Face Masks to avoid export issues.
Featured Resource
3 thoughts on “Adding Products to Your Store”